Vintage Story
- How to update your server
- Creating a time based schedule
- Backing Up Vintage Story Safely
- How to upload saves
- How to use custom game settings from singleplayer to create a world
How to update your server
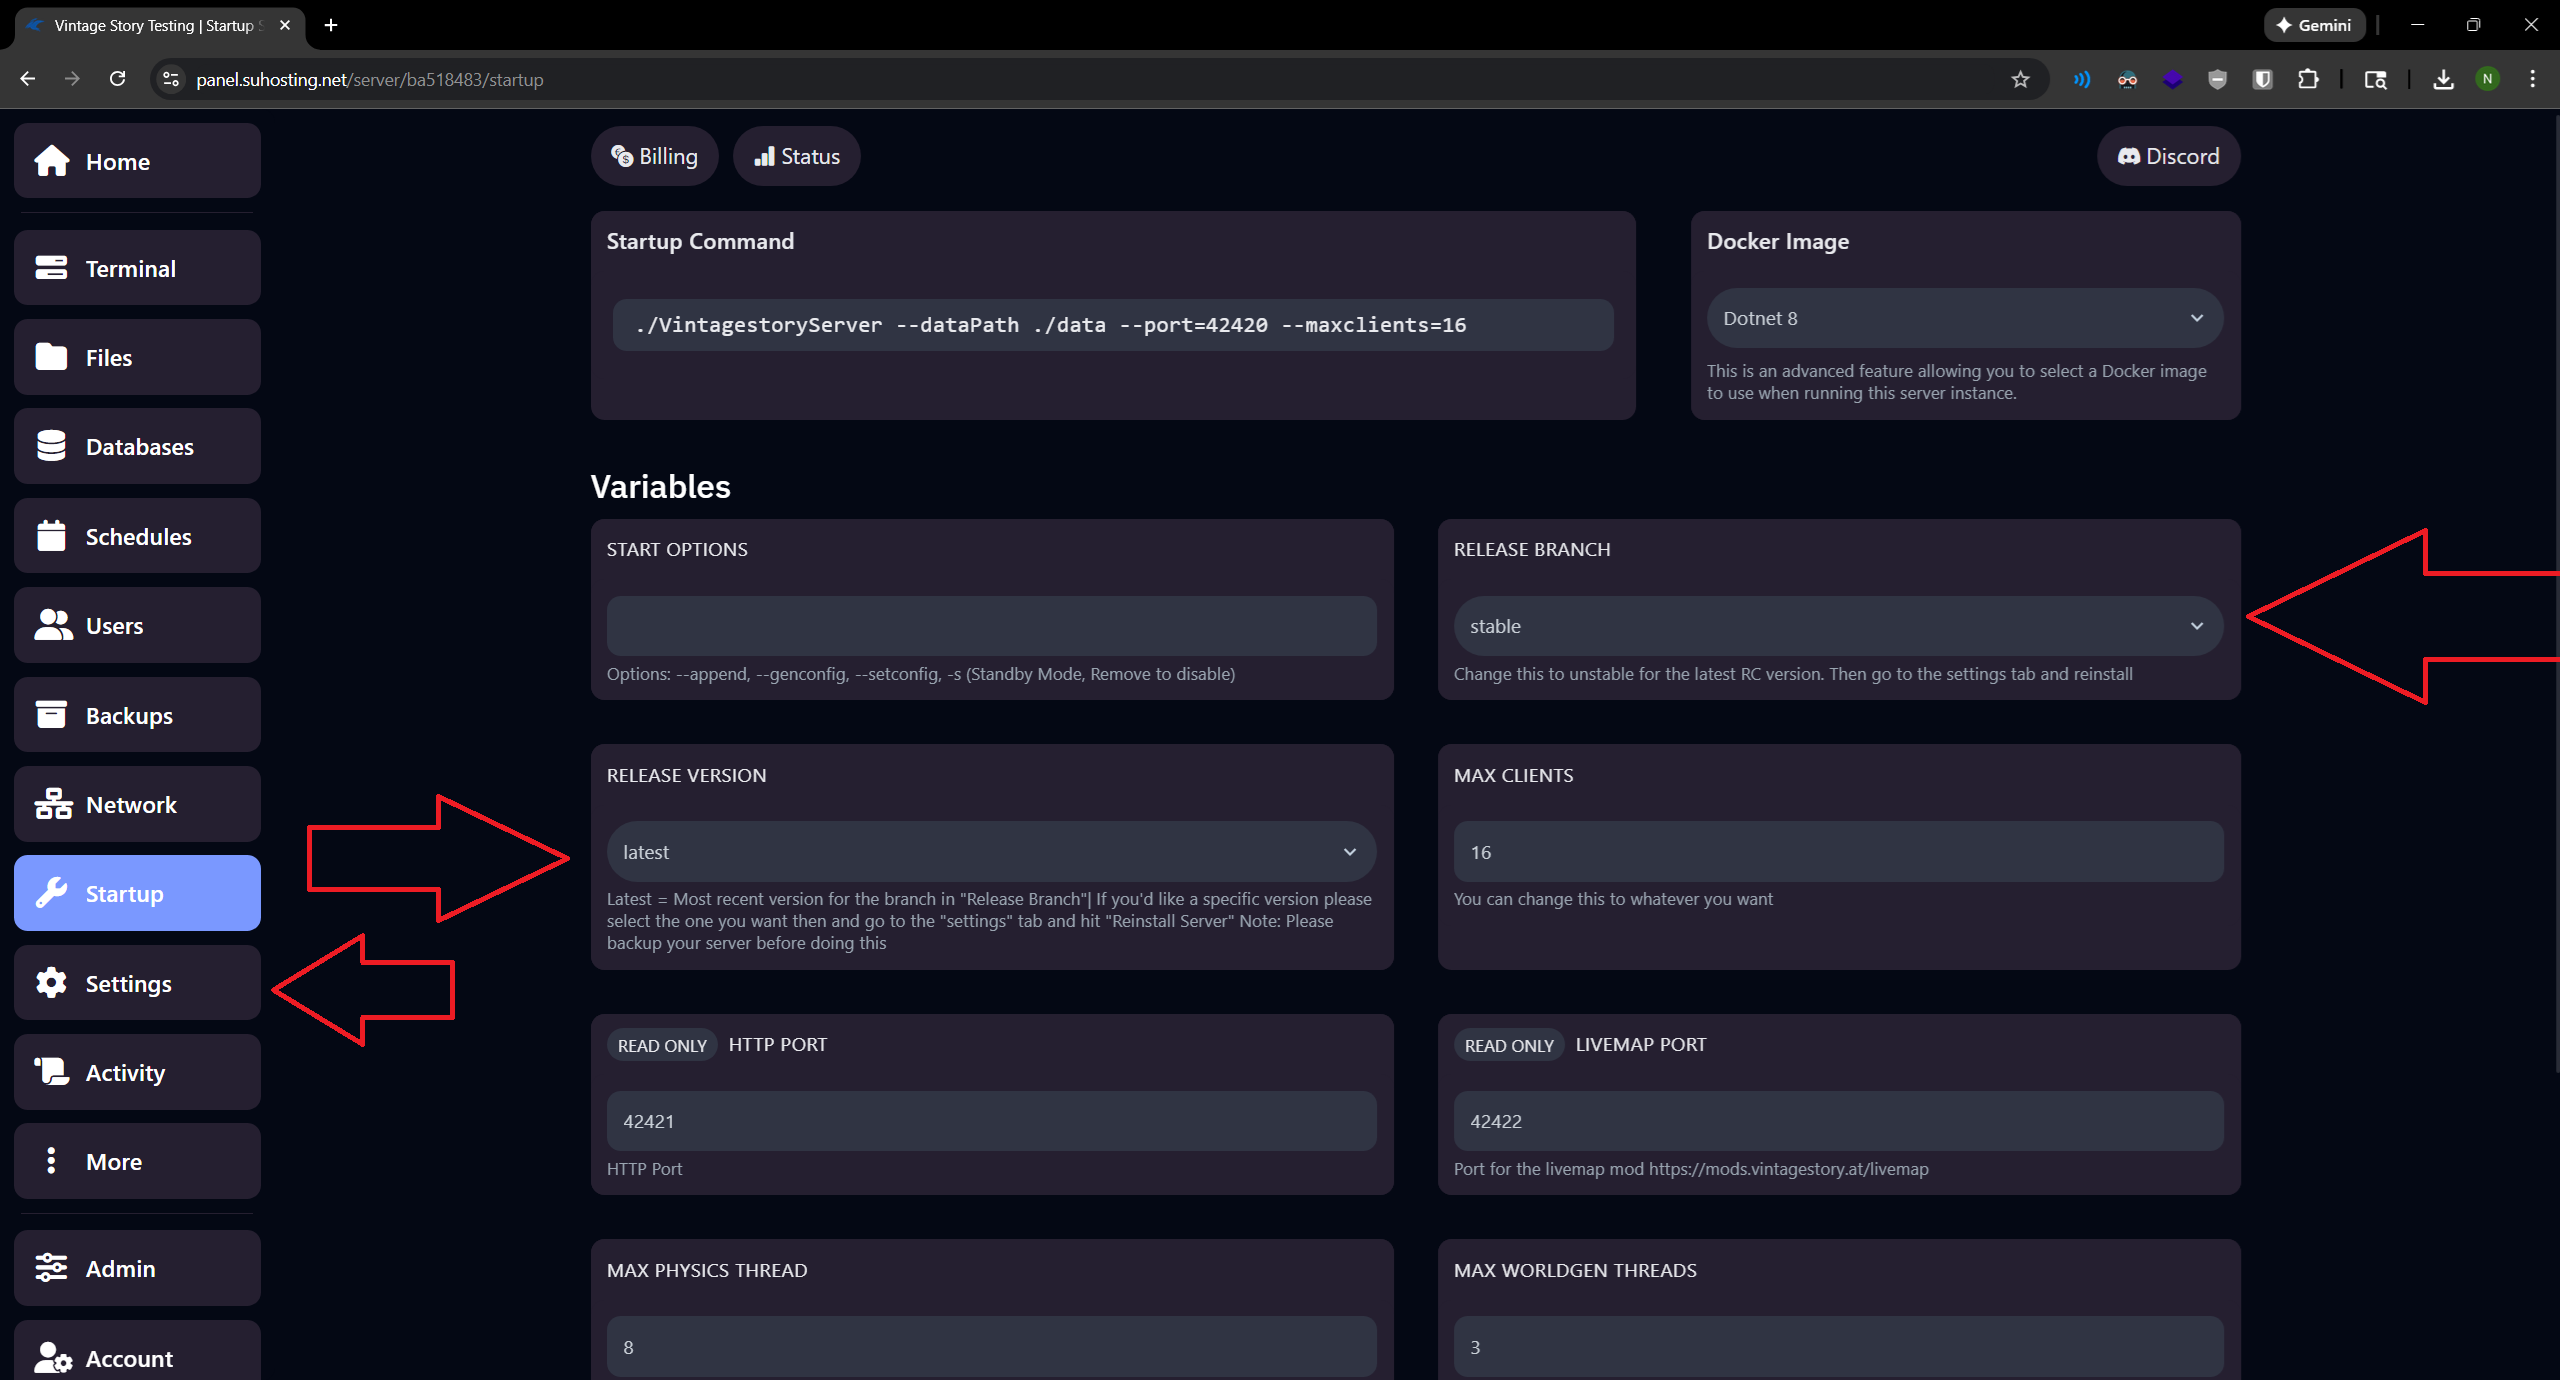
Shut down your server at the terminal, go to the "Startup" tab, find "Release Version", and select which version of the game you want the server to run on. Selecting "latest" will select the most recent public update. After selection, go to the "Settings" tab, and click "Reinstall Server". You may now start the server again. This should not affect your world, mods, or players, but remember to create a backup of your world before you change versions!

Creating a time based schedule
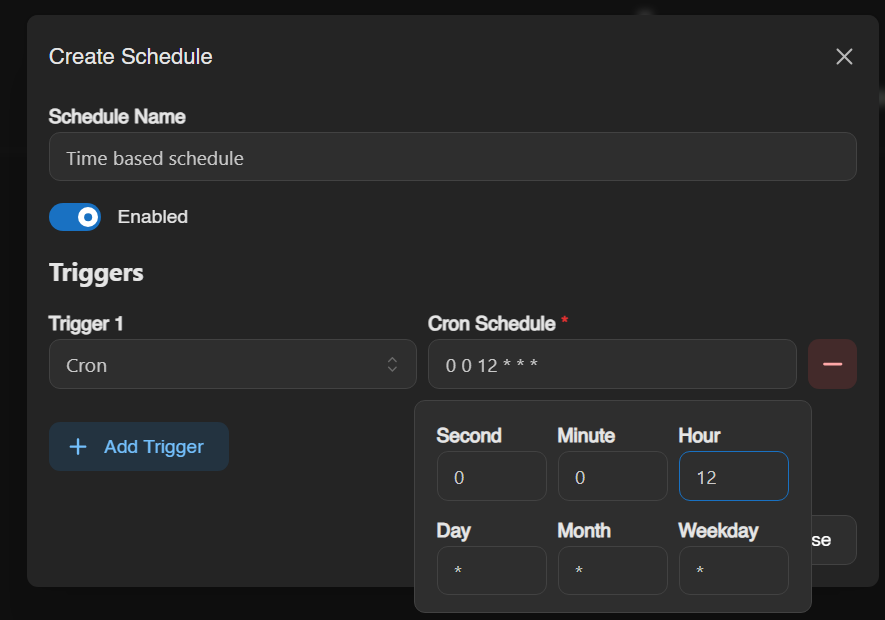
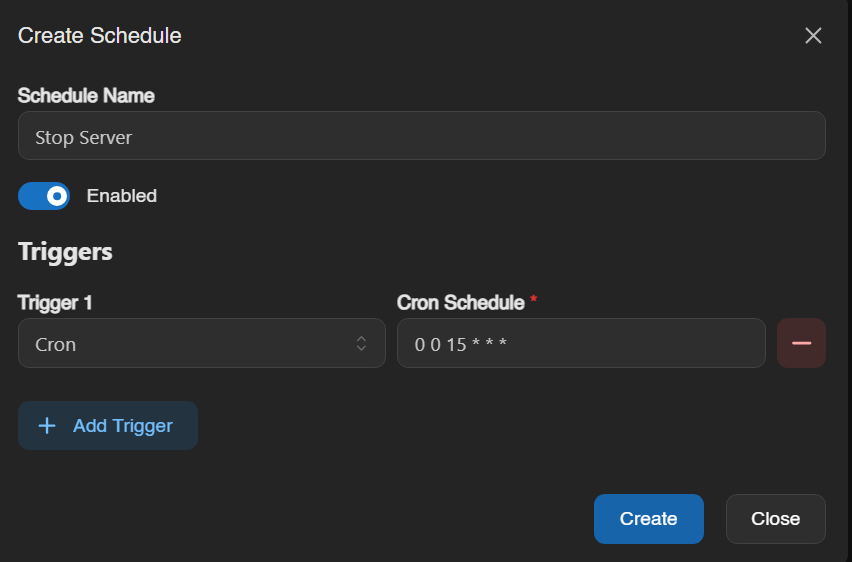
To create a schedule that runs at a specific time first click the create button, then name it and create a trigger. If we want to start the server at 12pm for example we'd do the following. 0 0 12 * * * Starts the server at 12pm exactly. It's important we set the second and minute to 0.
Next we need to add our action, in this example we want to start the server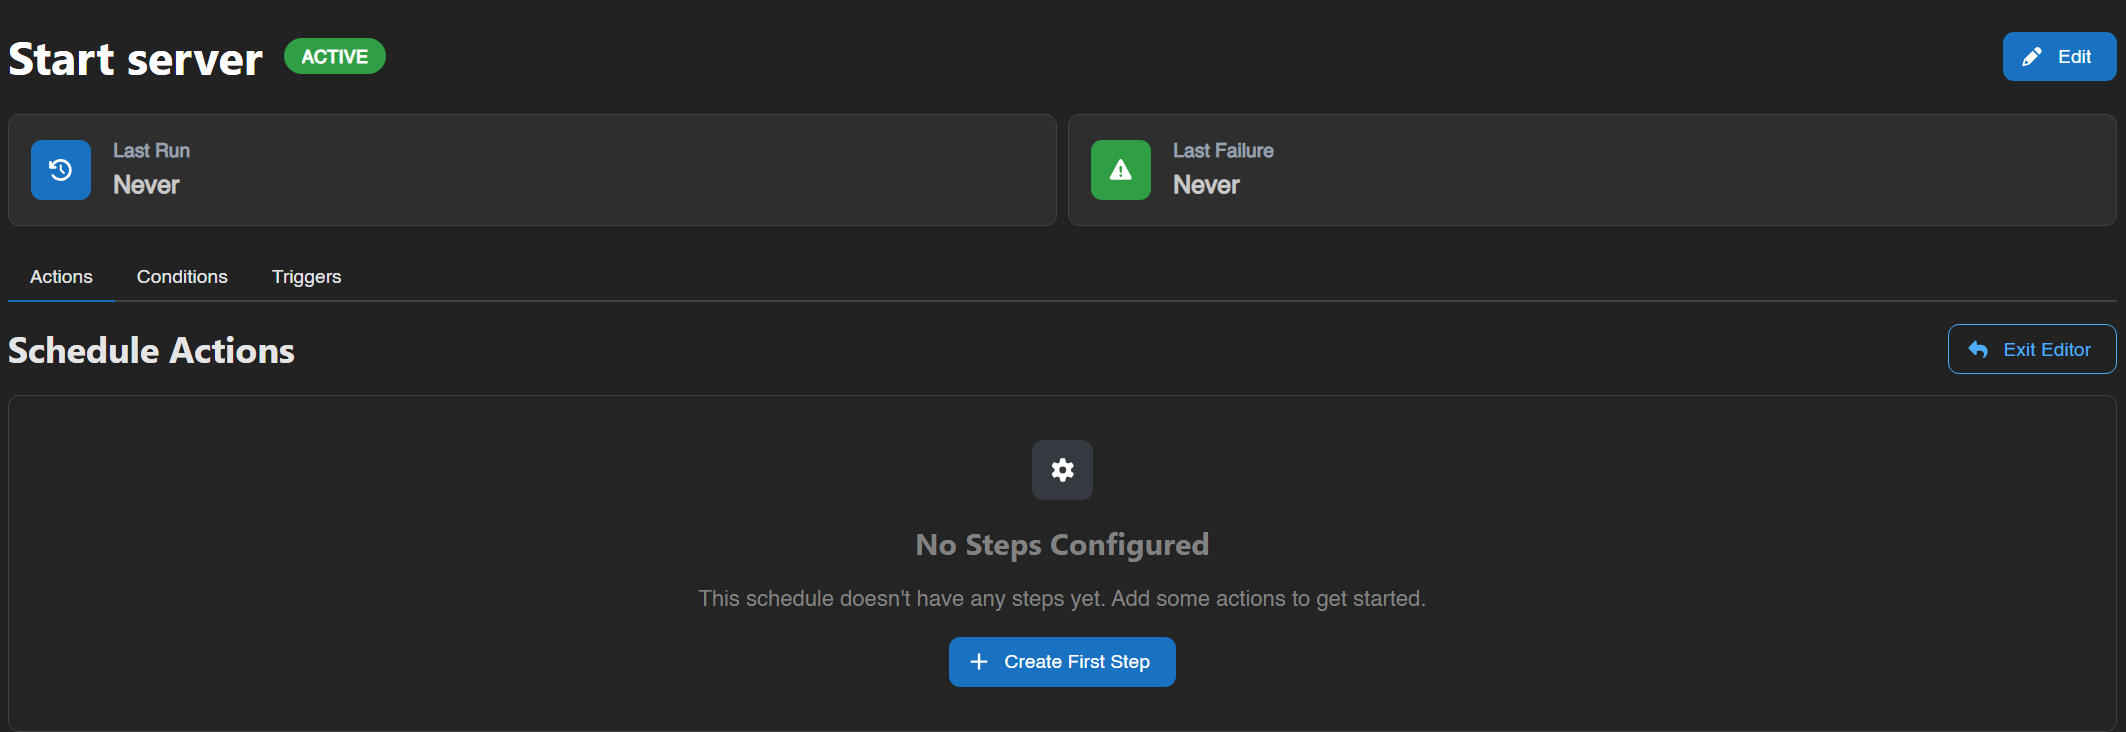
Click "Create First Step"
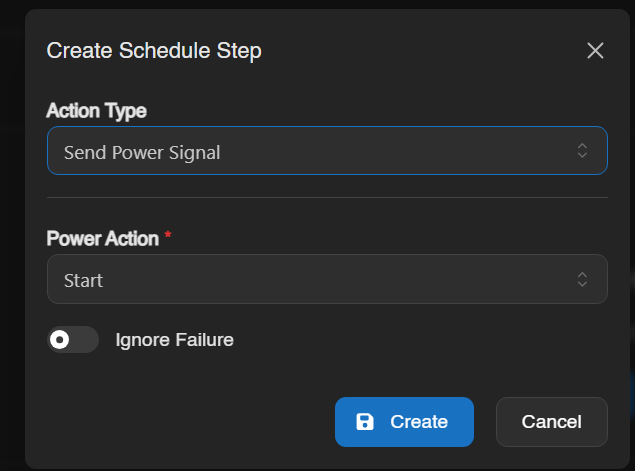
Change the action type to "Send Power Signal" and the power action to "Start", click create and that's it for your start action.
Next create a new schedule to stop the server. In this example we're stopping the server at 3pm
after that add the same new action to stop the server and you're all set
Backing Up Vintage Story Safely
What this is about
On the Backups tab for a Vintage Story server, you may see a warning that it is unsafe to back up while the server is running. This article explains why that happens, what can go wrong, and why ZFS-enabled nodes don't have this problem.
You'll only see this warning on nodes that don't use ZFS. If your node uses ZFS, backups are already safe to take at any time — see the related article on ZFS backups.
How Vintage Story stores your world
A Vintage Story savegame is a database file (a .vcdbs file, which is an
SQLite database):
- Autosave runs on a timer — every 5 minutes by default.
- Chunks are written when they are saved and unloaded (for example as players move around the world).
- A final save happens on a clean server shutdown.
- Alongside the main database file, the database keeps a journal / write-ahead log so it can safely commit changes.
The important detail is that a save is not one instantaneous write. It's a short sequence of writes spread across the main database file and its journal. Most of the time nothing is being written — but while a save is in progress, the files on disk are momentarily inconsistent until it finishes.
Why backing up while running can corrupt the save
A normal (non-ZFS) backup works by copying files off the disk one at a time. If a save happens to be in progress while that copy runs, there are two distinct ways it can go wrong:
Failure mode 1 — a torn write. The backup copies the savegame database while the game is partway through writing it, capturing a half-finished transaction. The file is internally broken on its own.
Failure mode 2 — a mismatched file set. The main database file and its journal / write-ahead log are copied at different moments. Each file may be perfectly valid on its own, but together they describe two different points in time and no longer agree with each other.
Either failure mode produces the same result: a backup whose database is in a state that never actually existed on the live server. When you try to restore it, the database engine may refuse to open it, roll back to an older state, or load with missing or damaged recent progress. In the worst case the world is unrecoverable.
Backing up safely on a non-ZFS node
You have two safe options.
Option 1 — use the /genbackup command (no downtime)
Run /genbackup from the server console (or in-game as an admin). This
asks Vintage Story itself to save the world and produce a consistent backup
of the savegame — the game performs the save and the copy together, so neither
failure mode above can occur. This is the recommended option because it does
not require stopping the server.
/genbackup writes the backup into the /data/Backups folder; you can
then safely archive that file through the panel.
Tip: install the Th3Essentials mod. It has a built-in option to run
/genbackup automatically on server shutdown, so a consistent save backup
is produced every time the server stops — without you having to remember to run
the command by hand.
For this to work, both ShutdownEnabled and BackupOnShutdown must be set to
true in the mod's config file at /data/ModConfig/Th3Config.json:
"ShutdownEnabled": true,
"BackupOnShutdown": true,
"ShutdownTime": "00:00:00",
ShutdownTime controls the scheduled shutdown (and therefore when the backup
is taken); adjust it to suit your server.
Option 2 — stop the server
- Stop the server (this flushes everything to disk and closes the database cleanly).
- Create the backup.
- Start the server again.
Why ZFS fixes this
A ZFS snapshot is atomic: it captures the entire filesystem — the savegame database and its journal — at the exact same instant. There is no window where some files are newer than others.
The state captured by a ZFS snapshot is a crash-consistent image: it looks exactly like the disk would look if the machine had lost power at that moment. SQLite (the database Vintage Story uses) is specifically designed to recover cleanly from that situation using its journal — the same way it recovers after a power loss. So even though the server was running, the restored world opens correctly and loses, at most, a few seconds of activity rather than becoming corrupt.
In short:
- Non-ZFS node: use
/genbackup(no downtime) or stop the server before backing up — otherwise you risk a corrupt save. - ZFS node: snapshots are atomic and crash-consistent, so you can back up safely at any time without stopping the server.
SuHosting is progressively migrating all nodes to ZFS so that every Vintage Story server can be backed up safely without downtime. See the ZFS backups article for more on that migration.
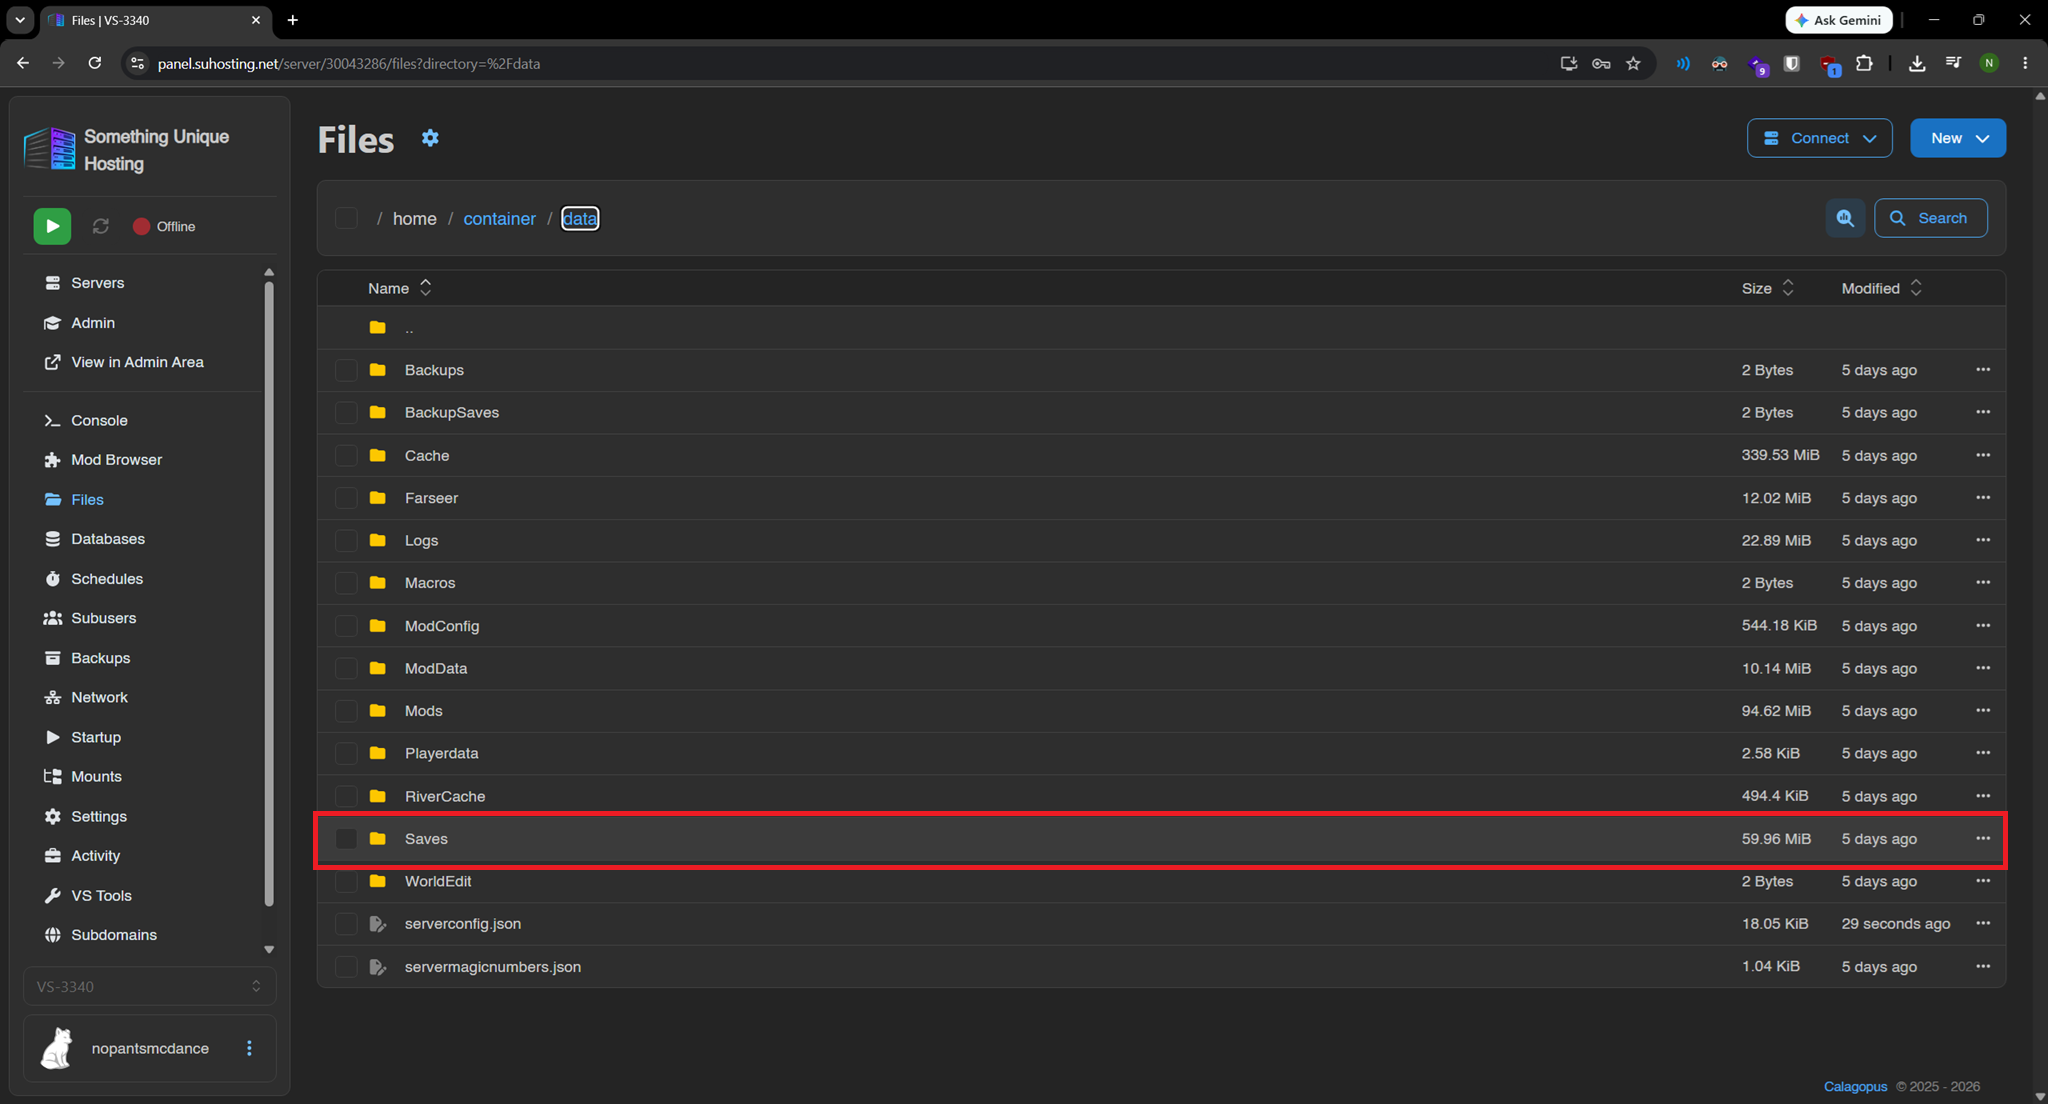
How to upload saves
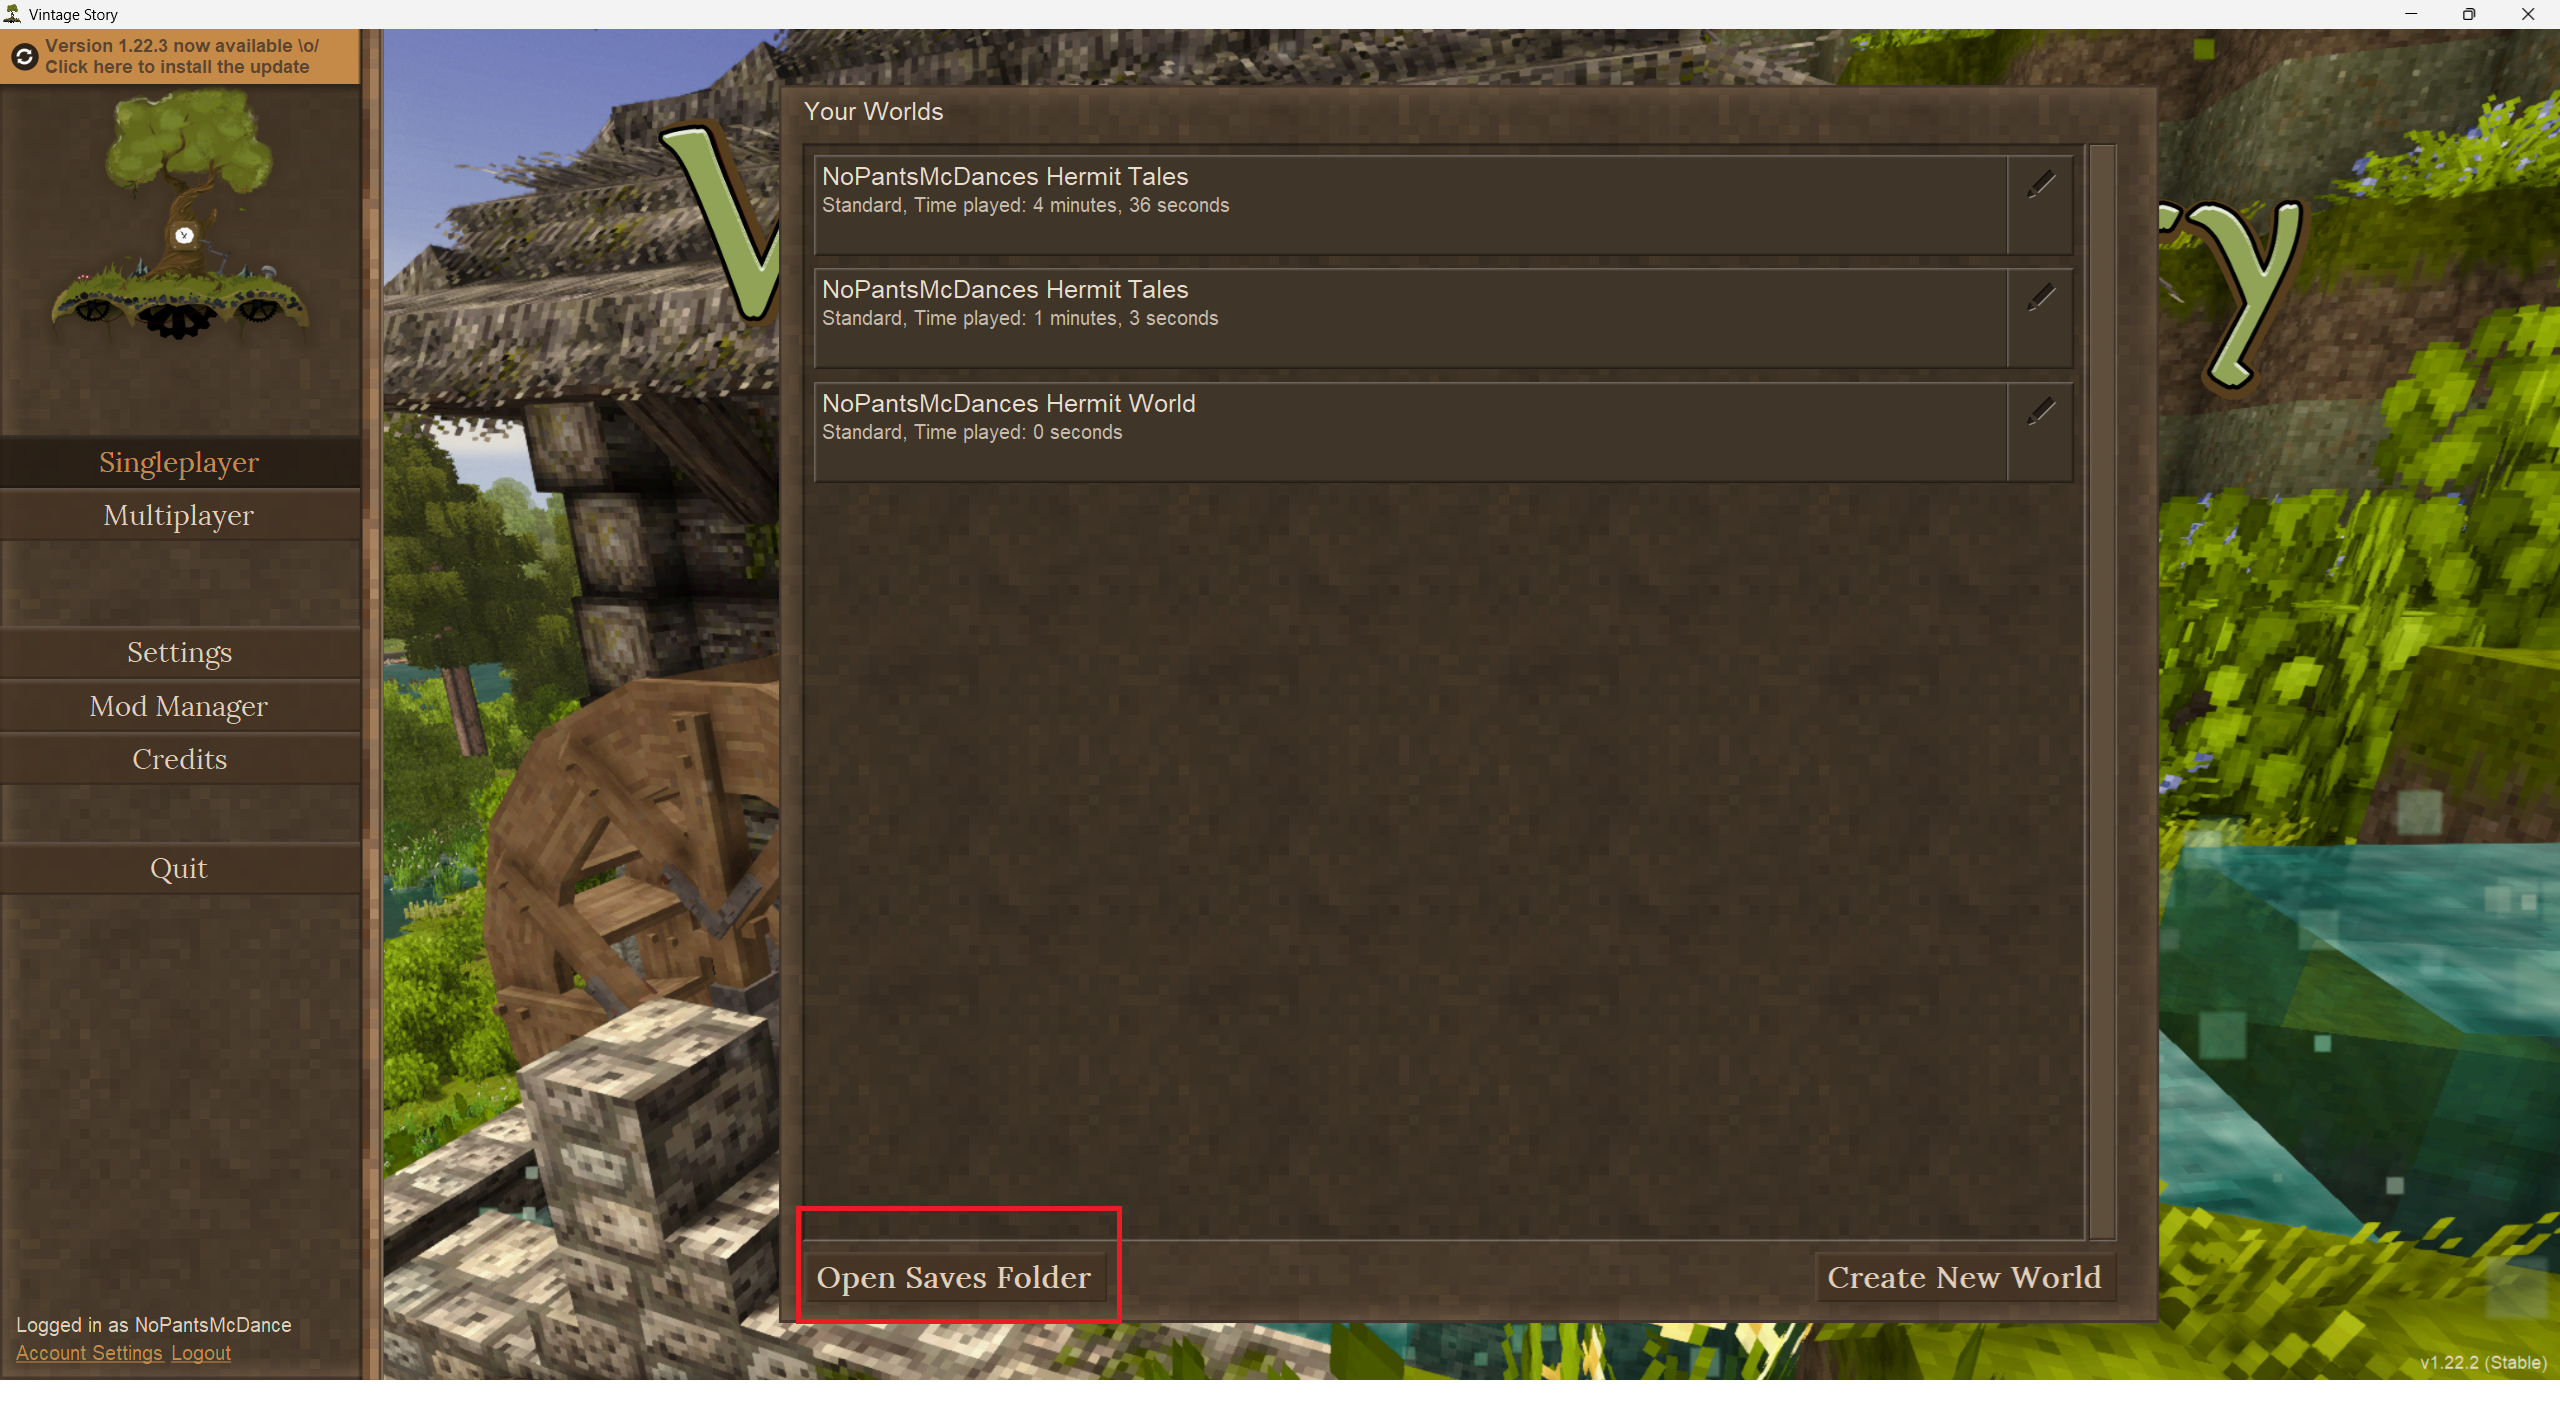
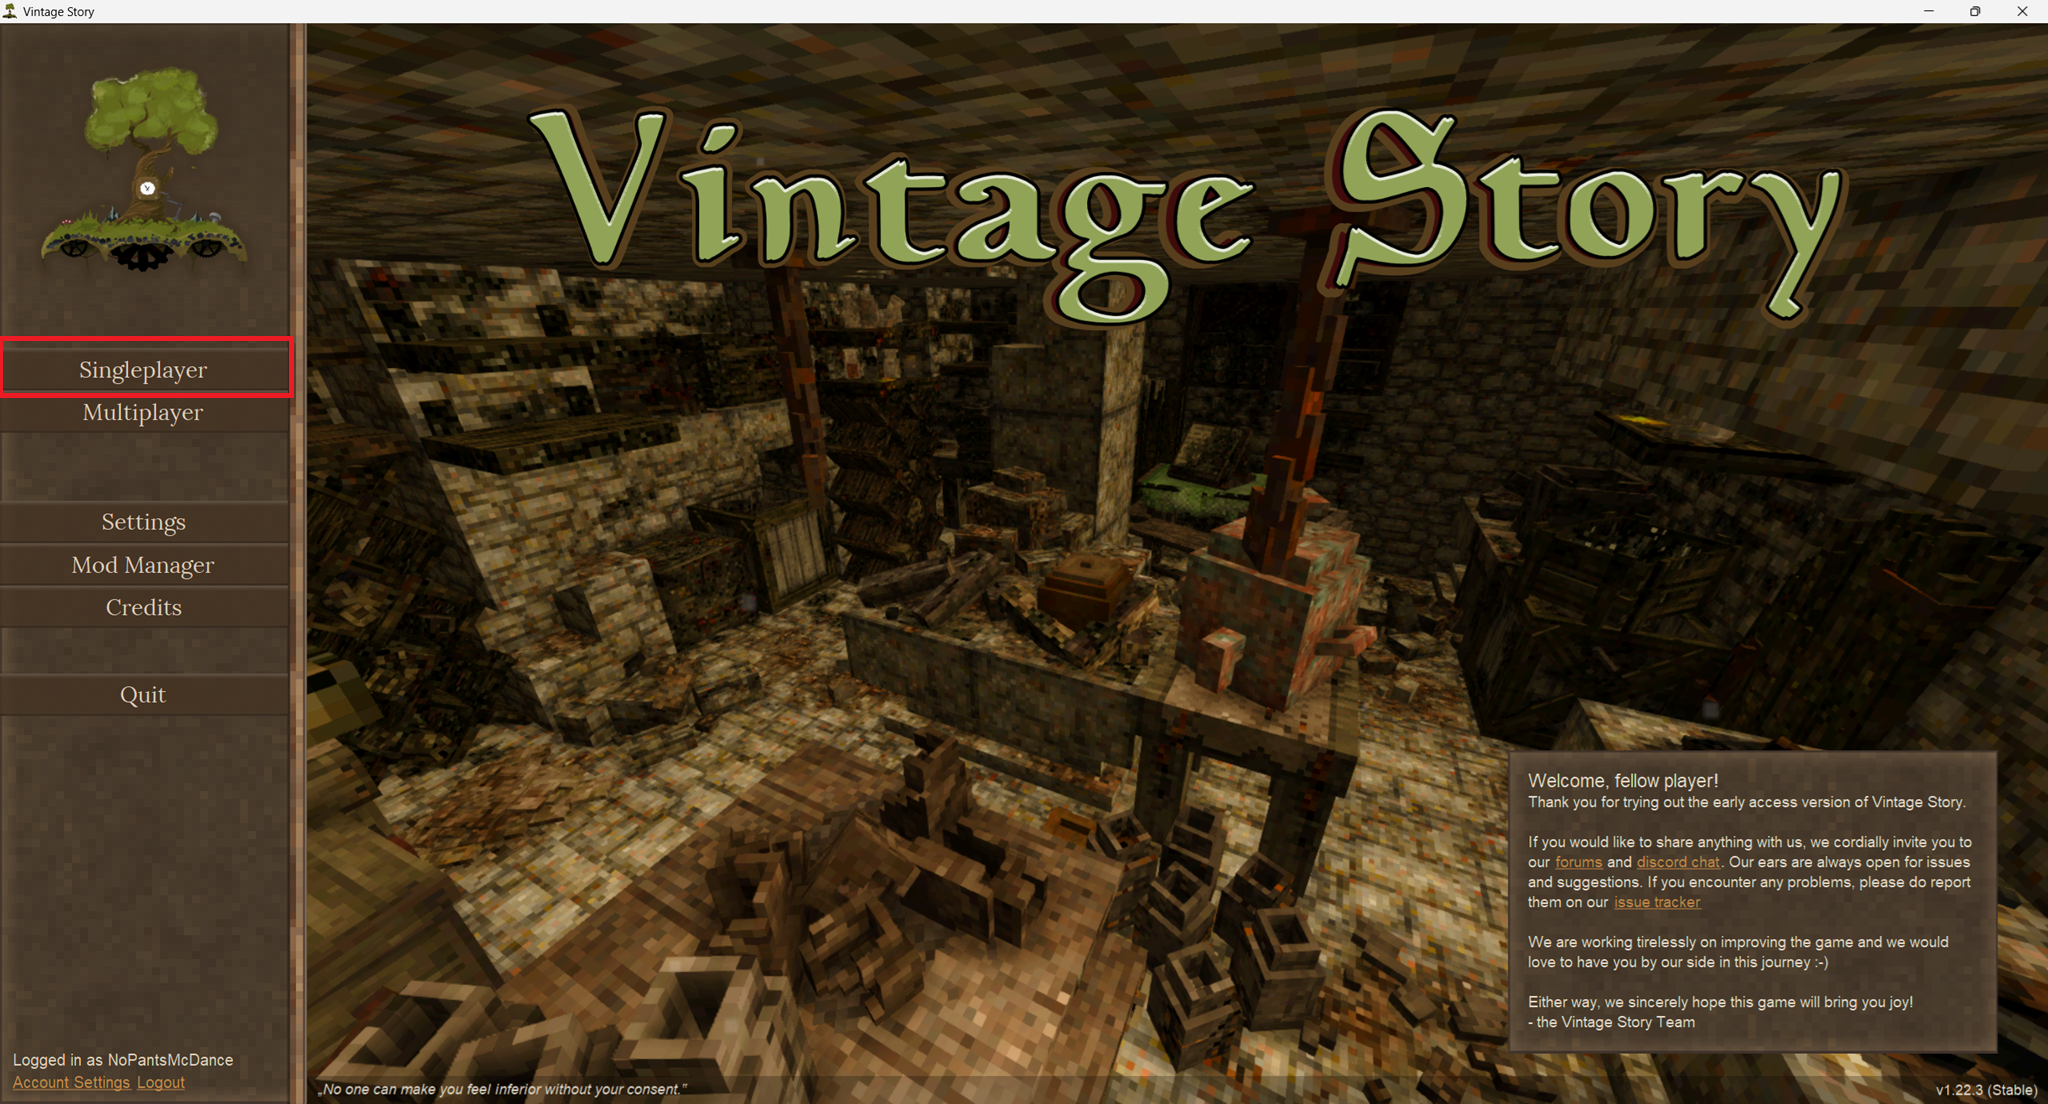
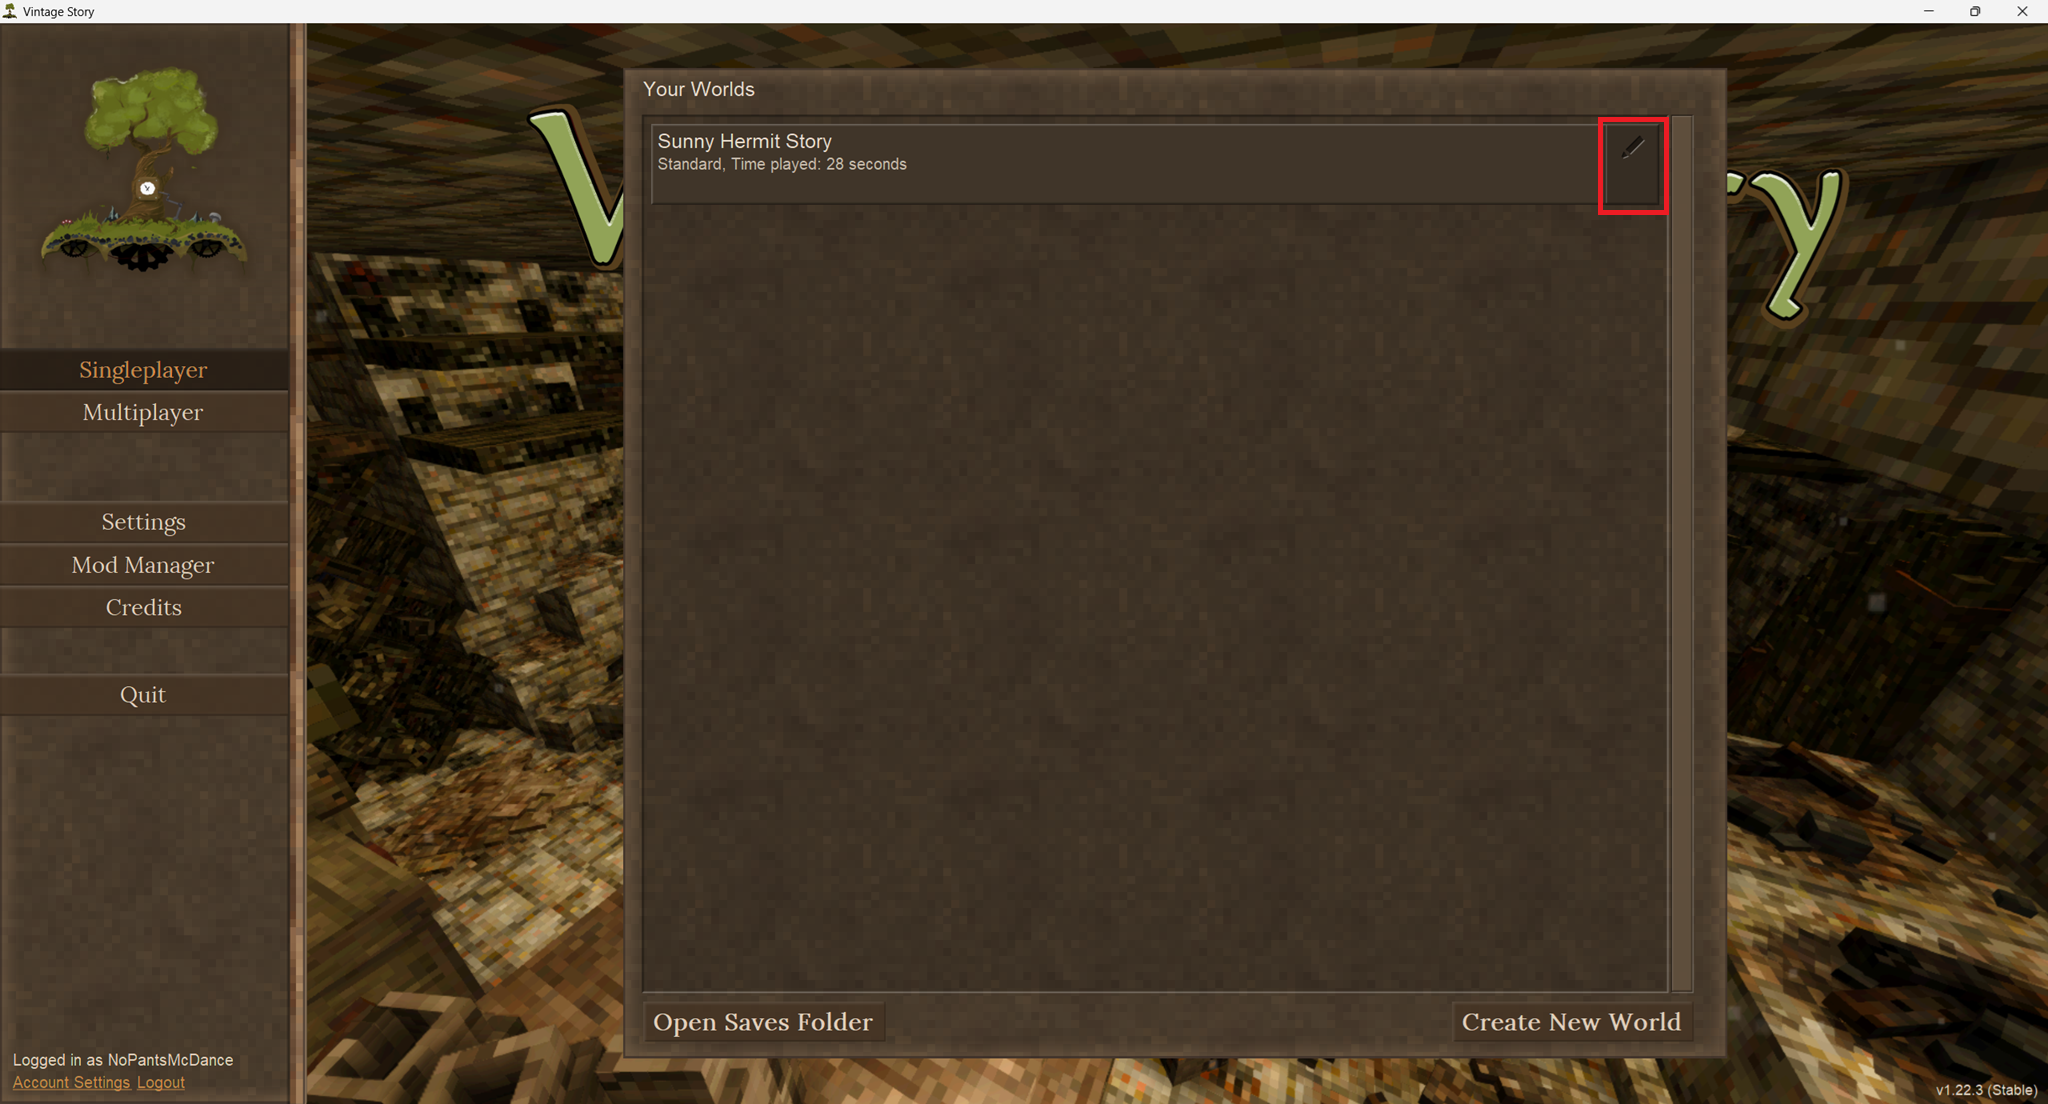
If you're going to use an existing save first open VintageStory and click singleplayer, then click the "Open Saves Folder" button in the bottom left.
Once the folder is open go to the game panel and click your server.
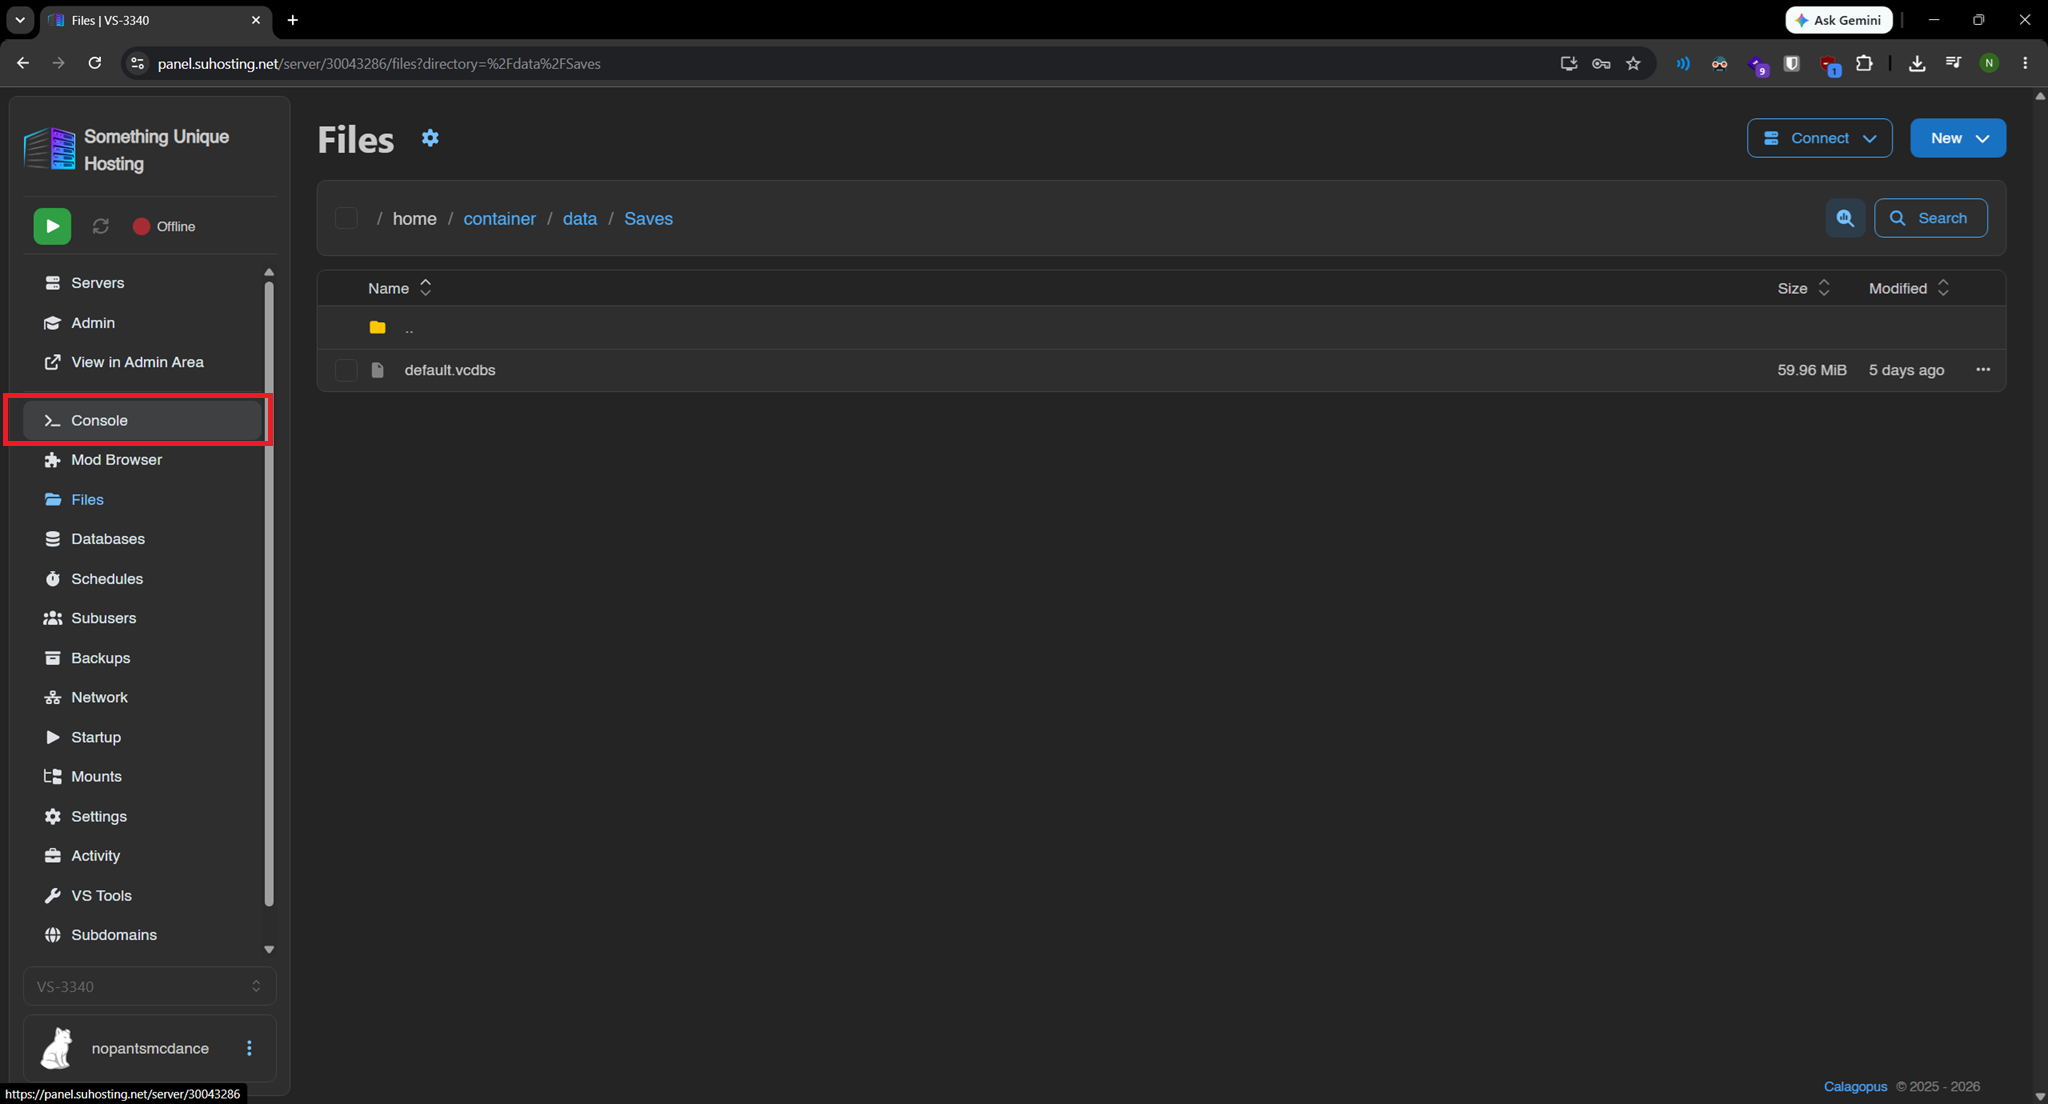
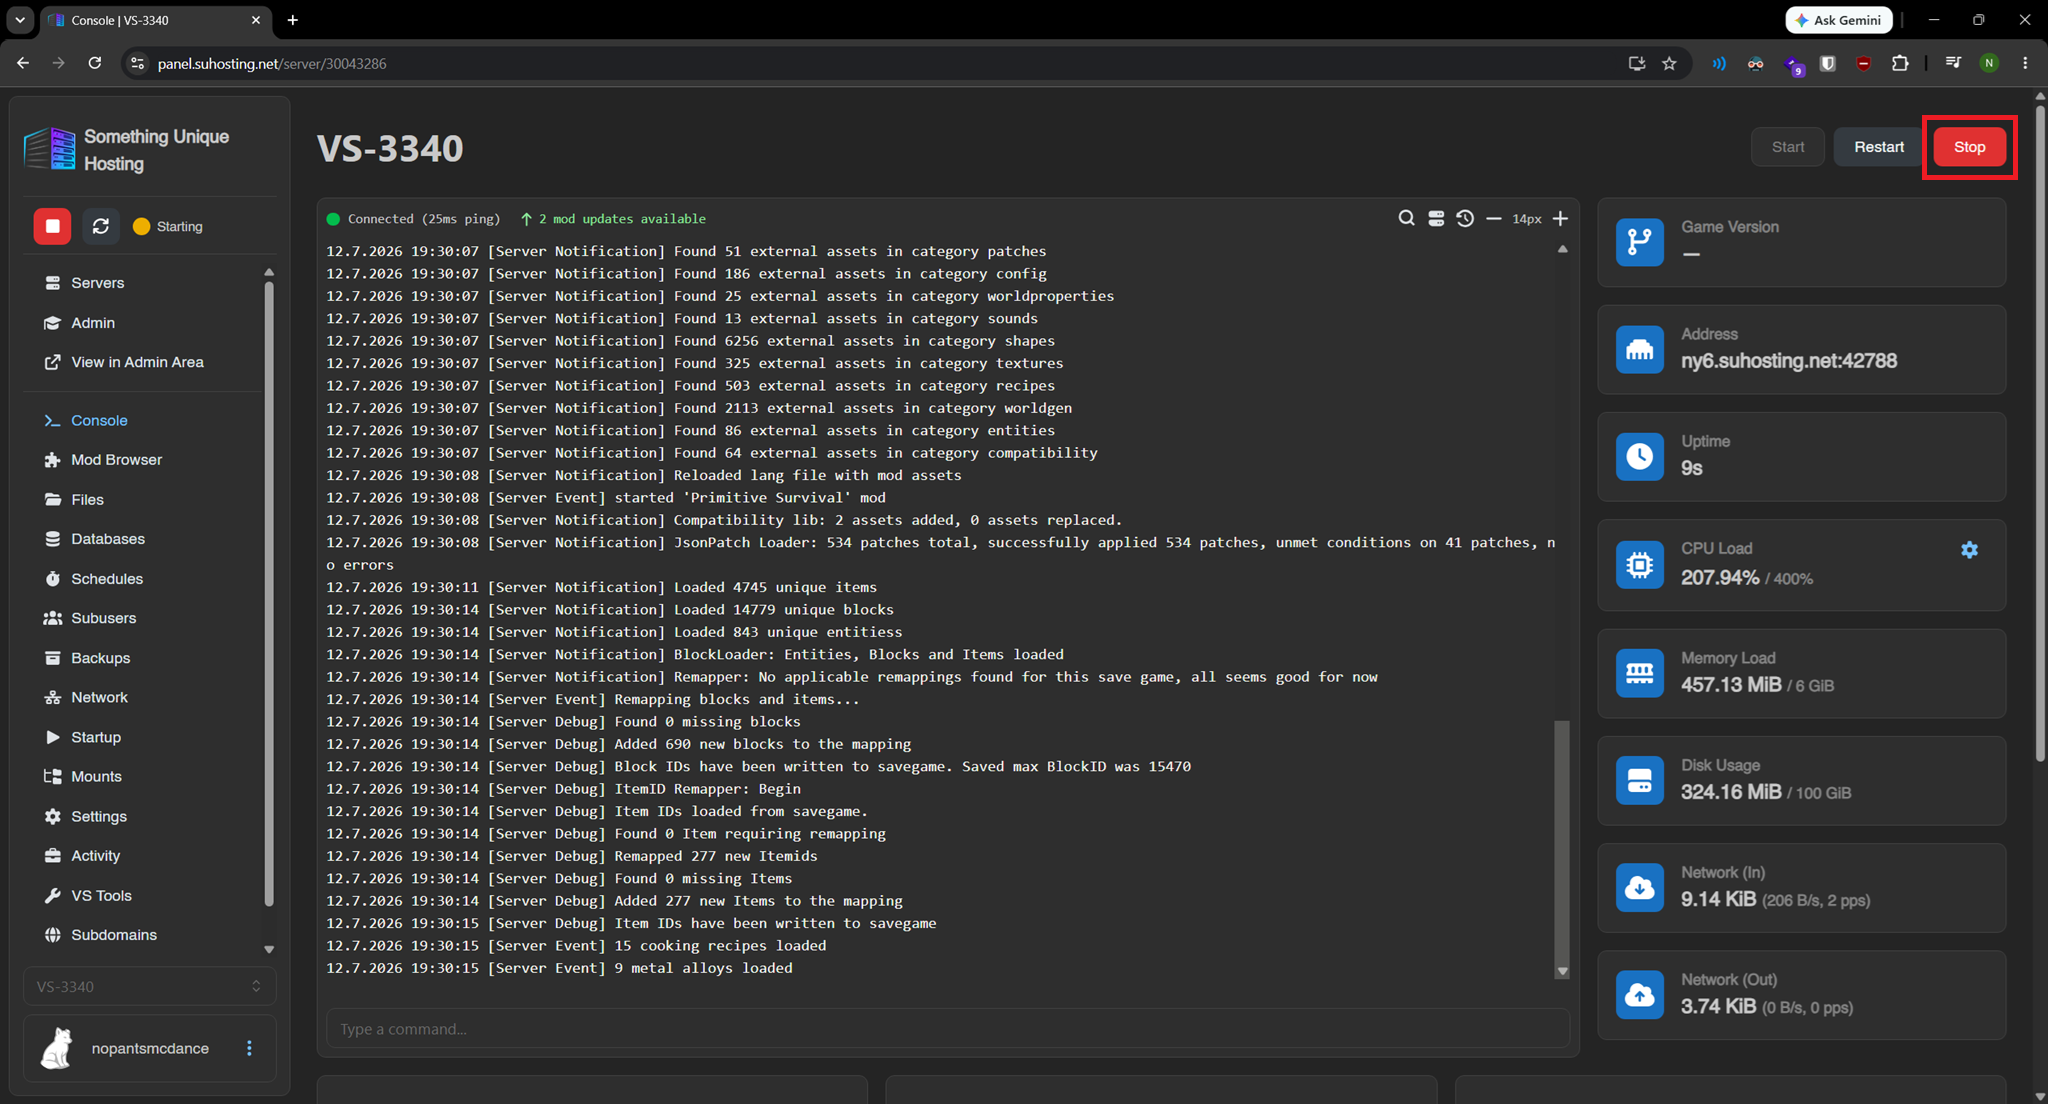
If the server is currently running stop it first.
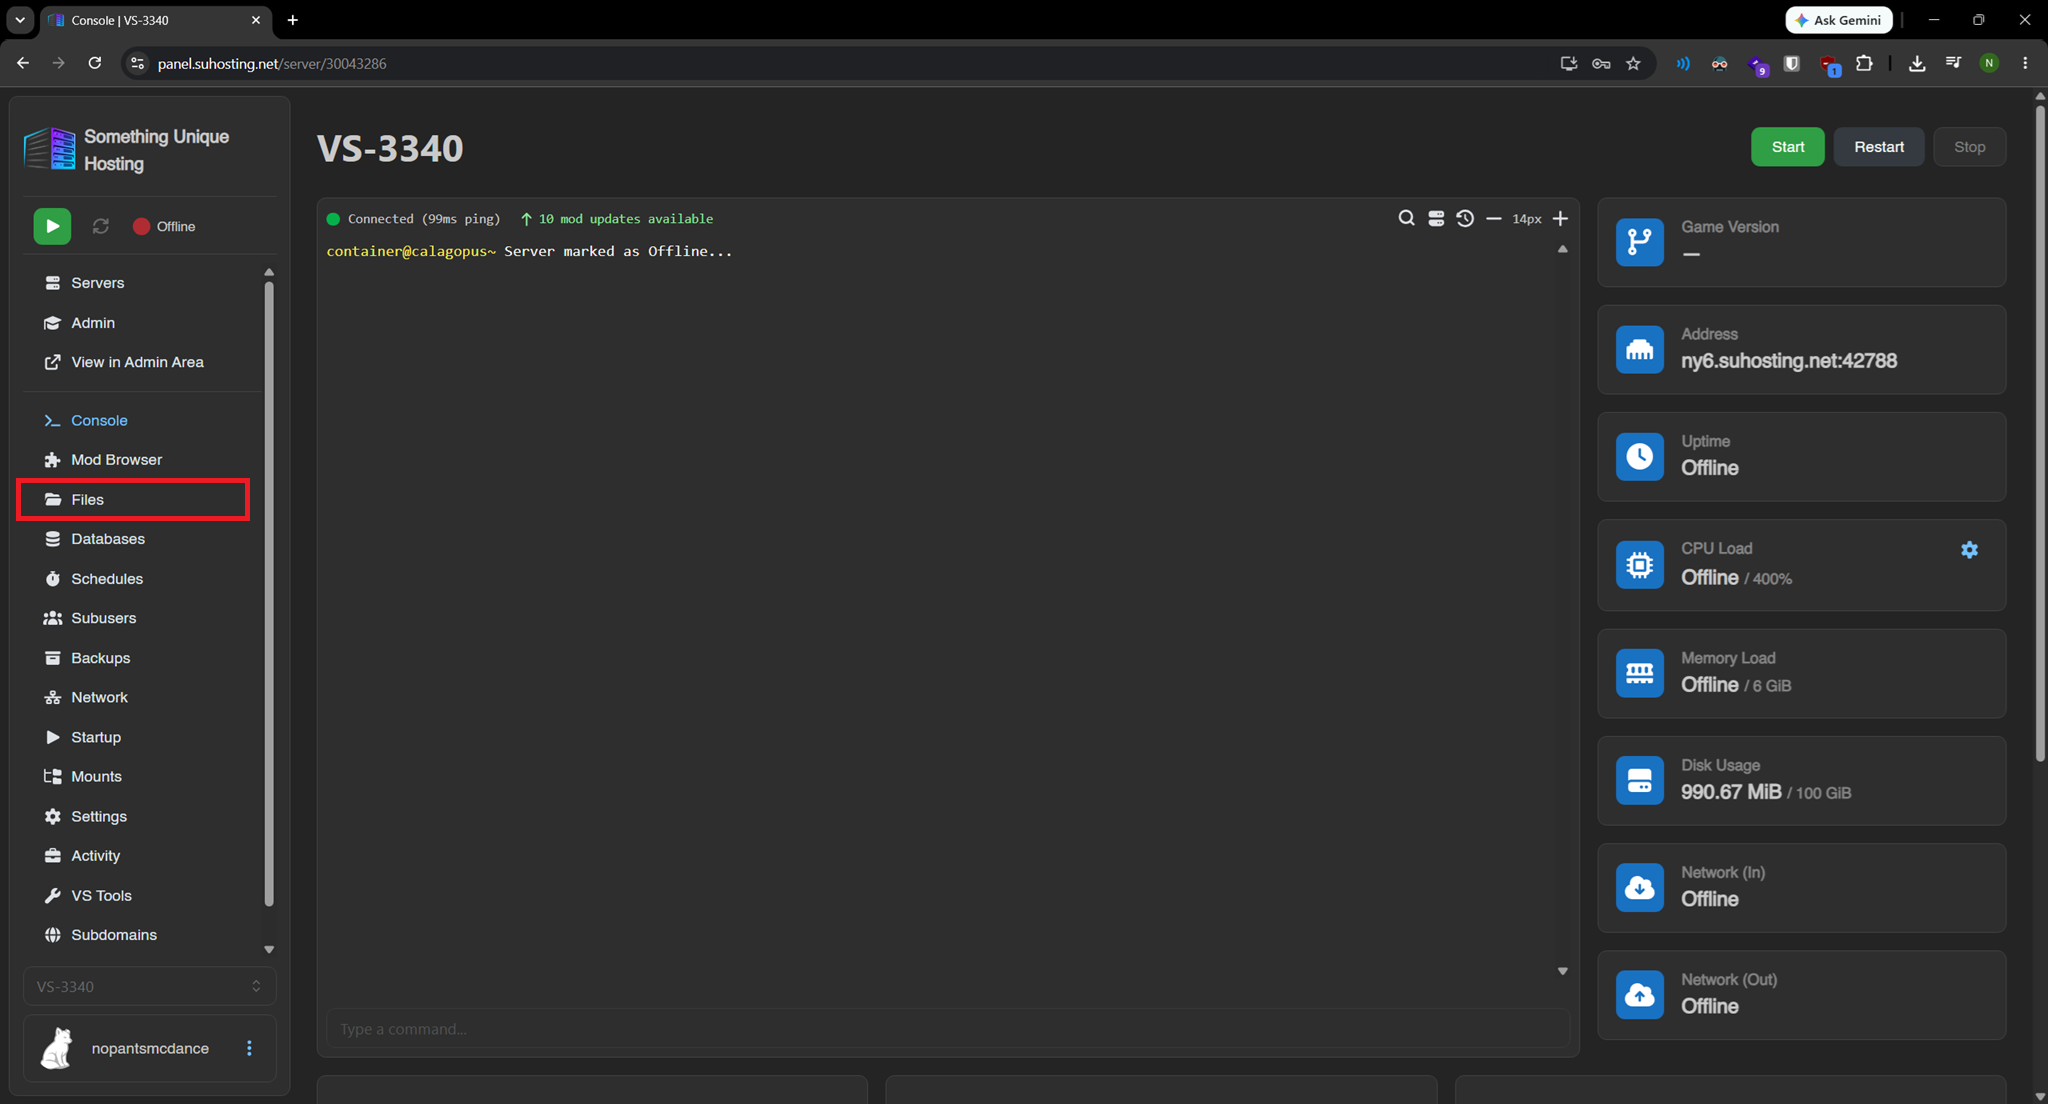
 Then go to the "files" tab.
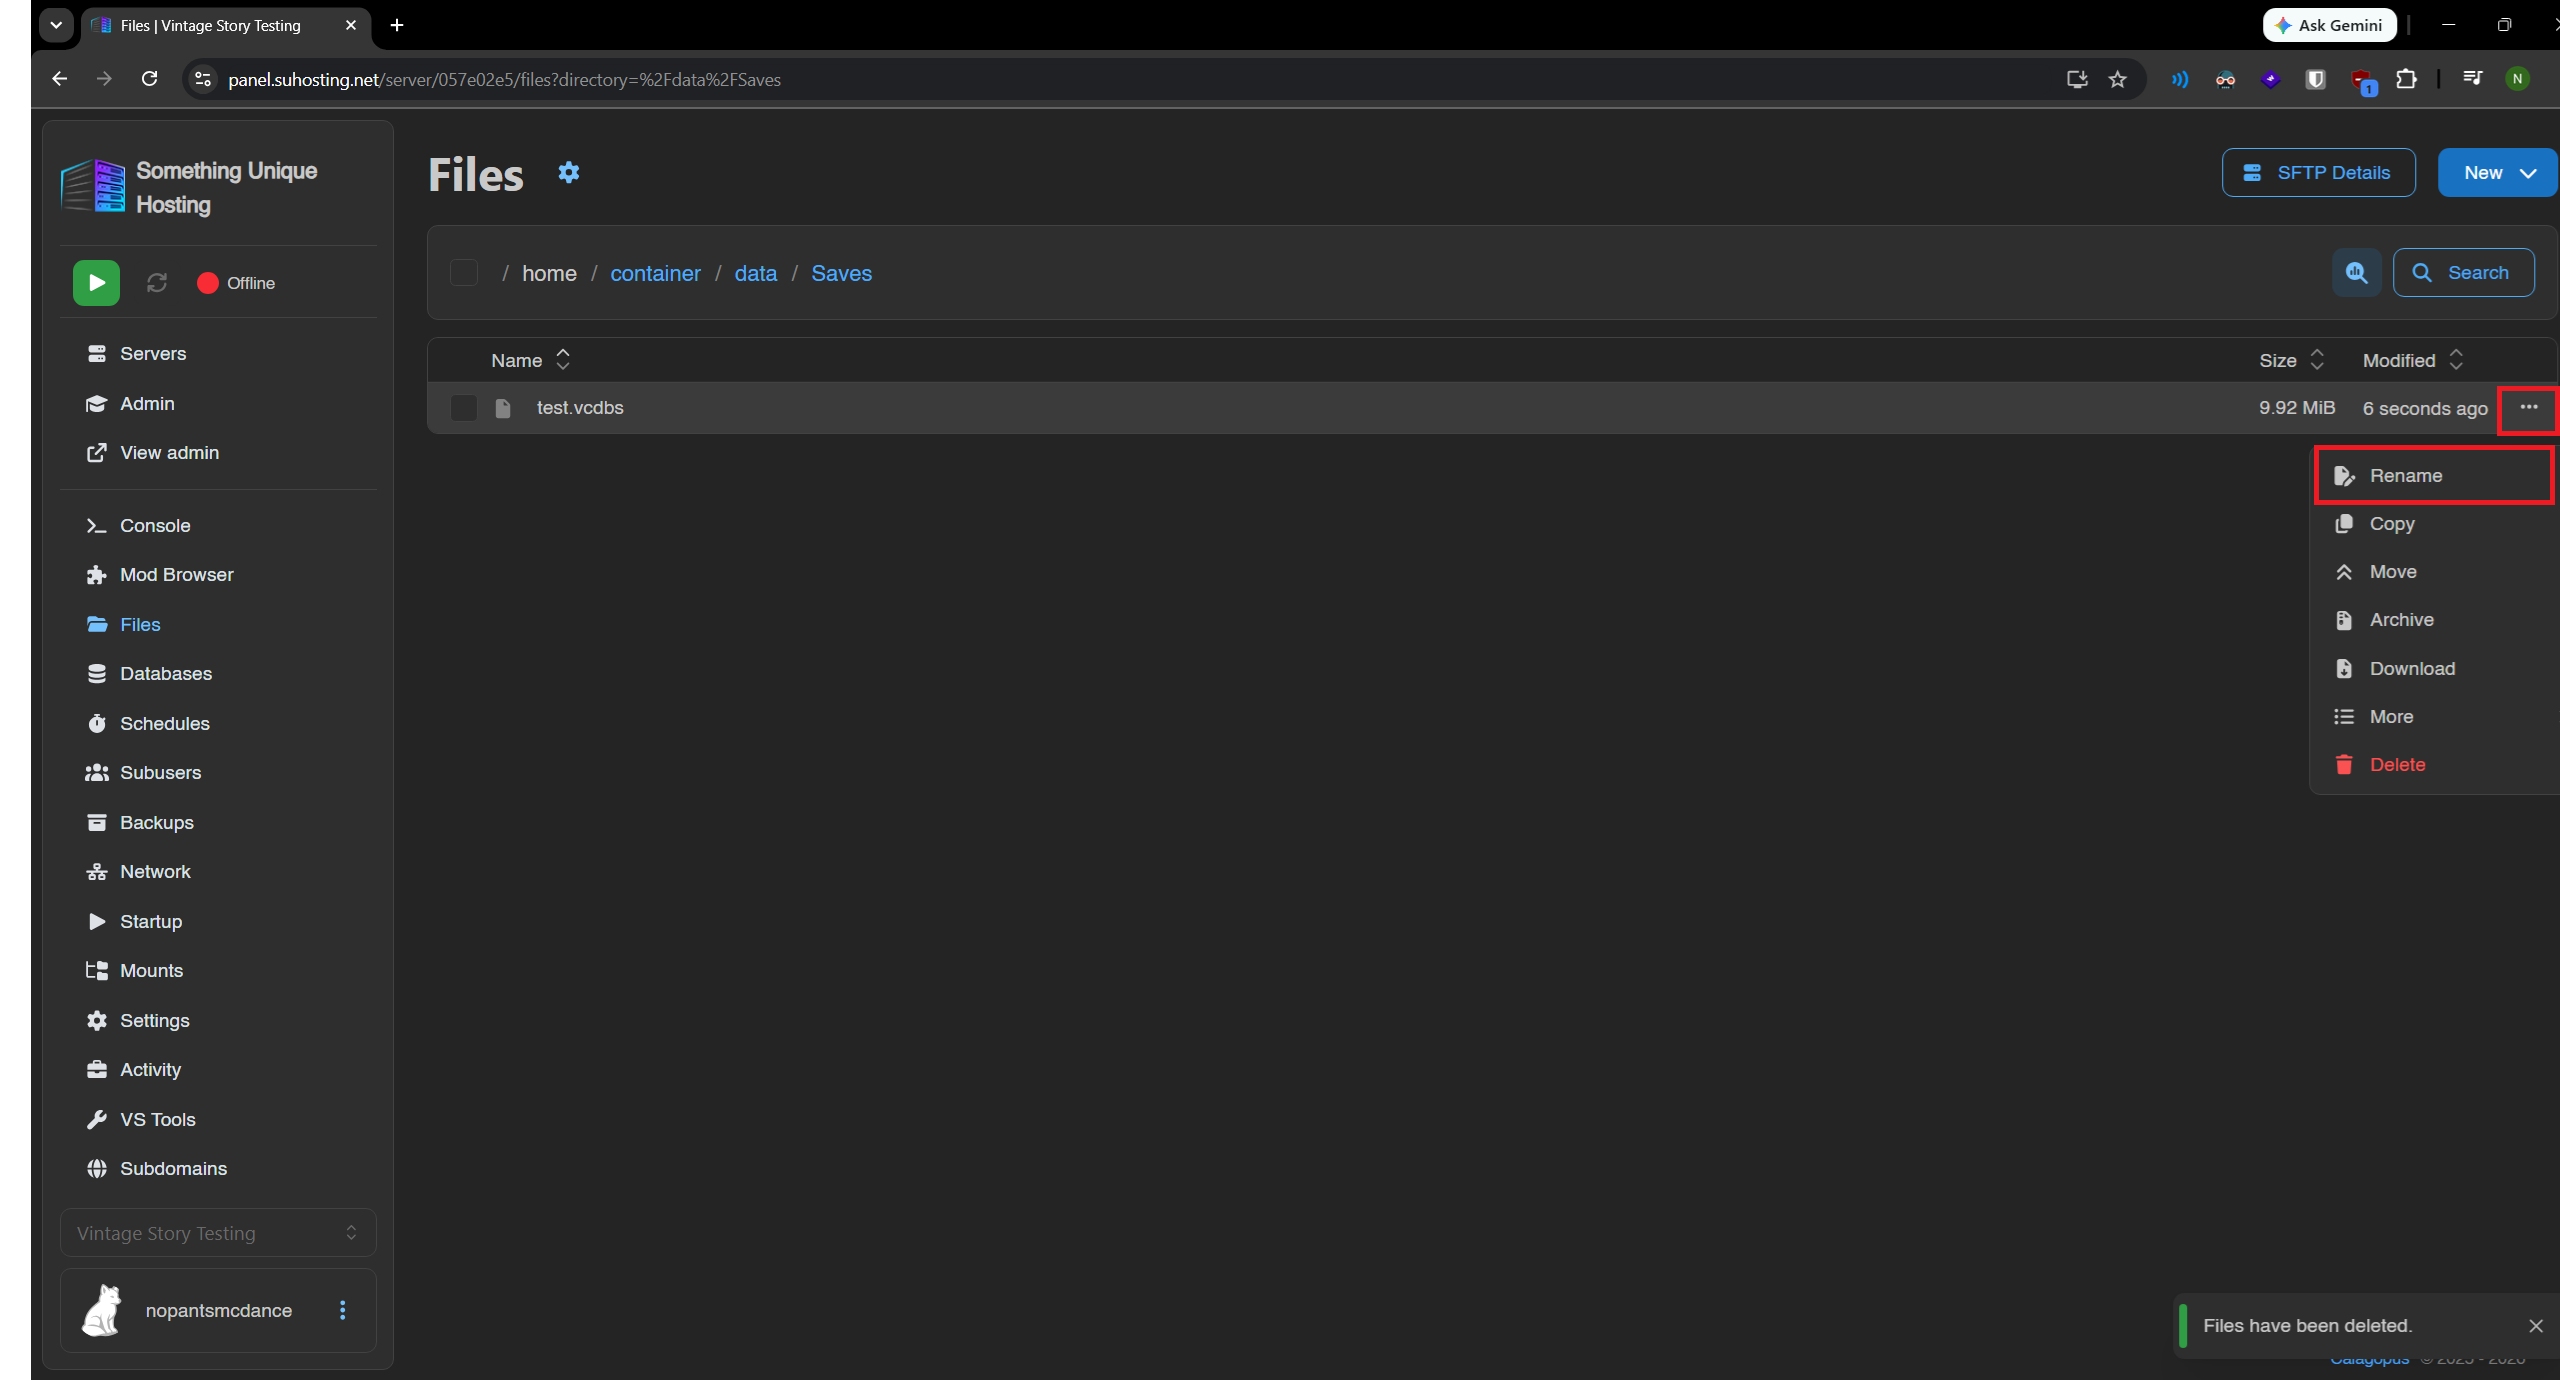
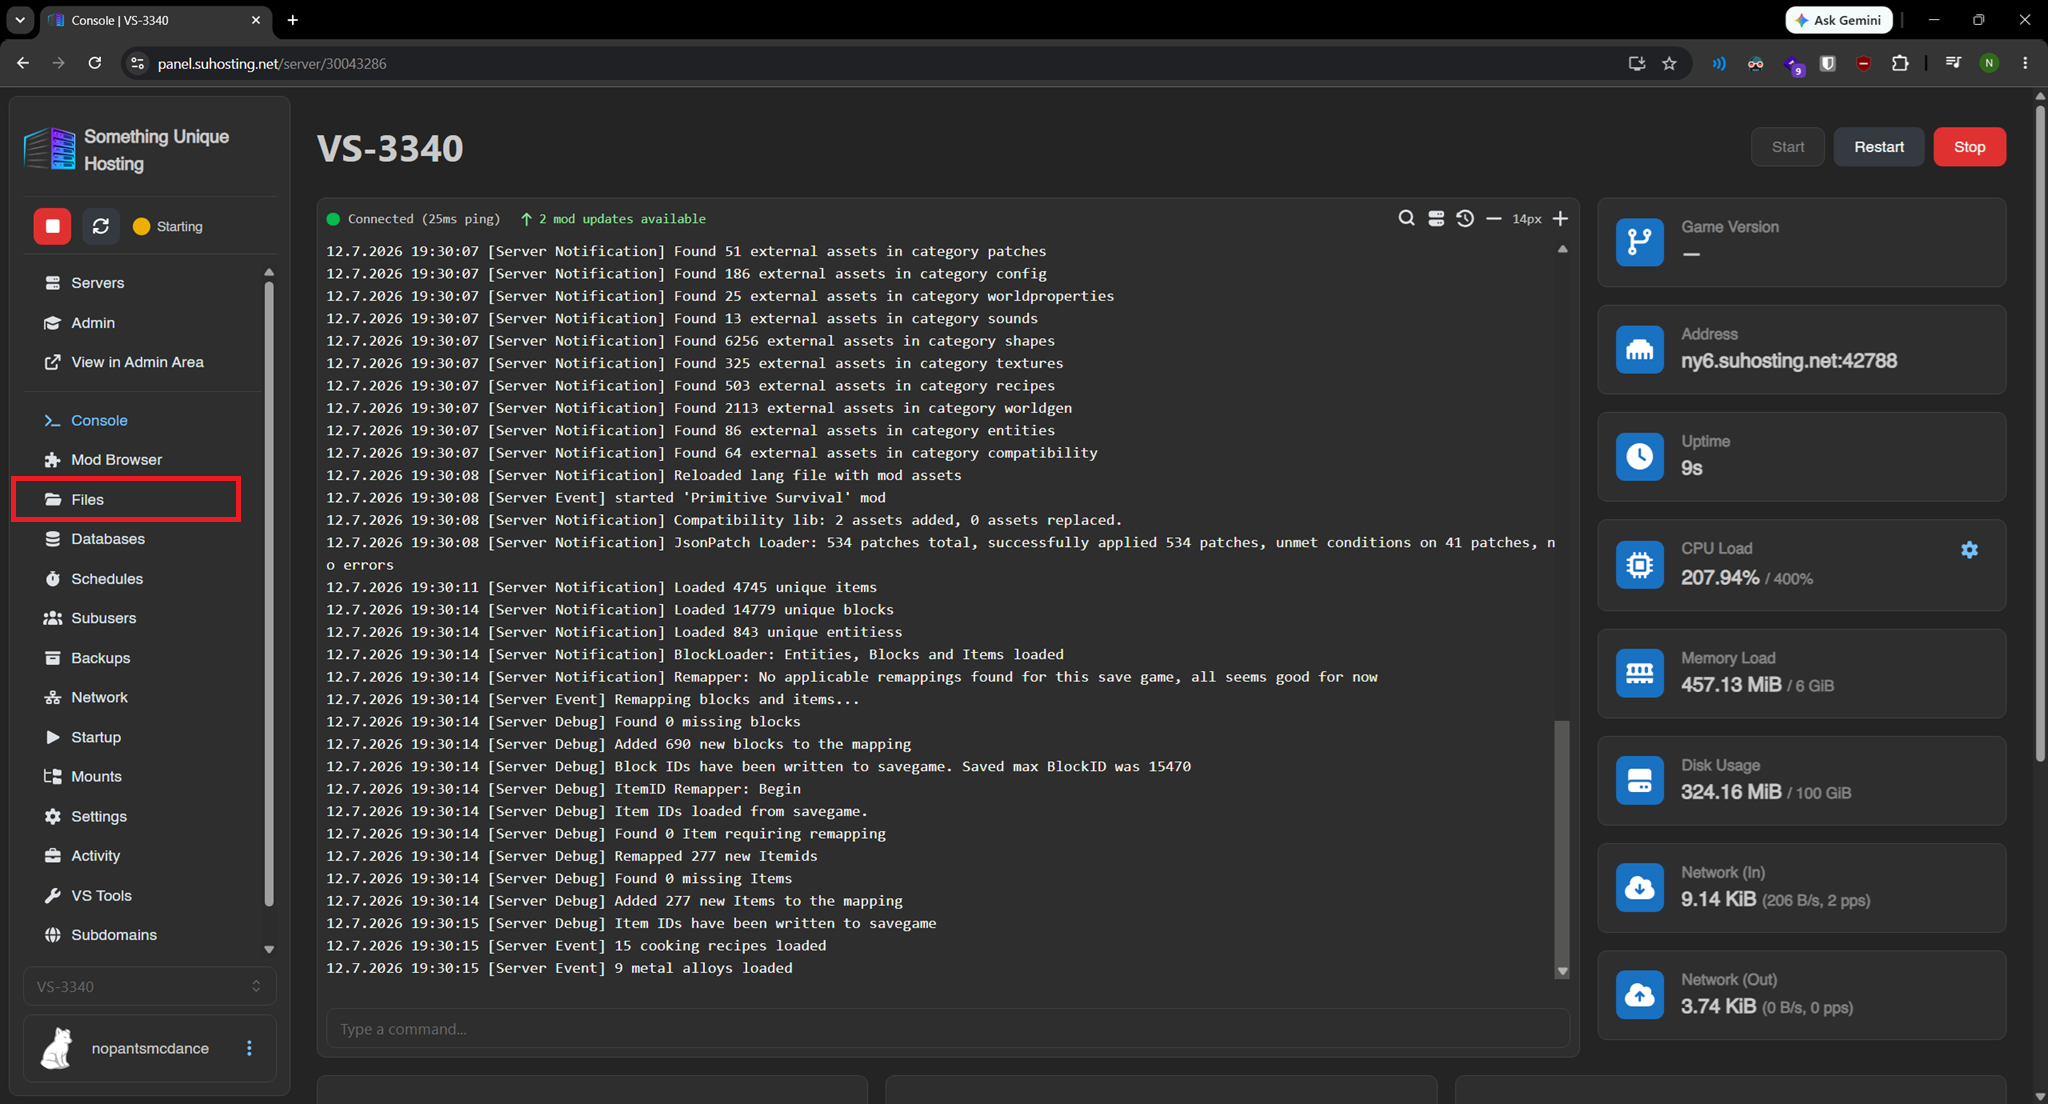
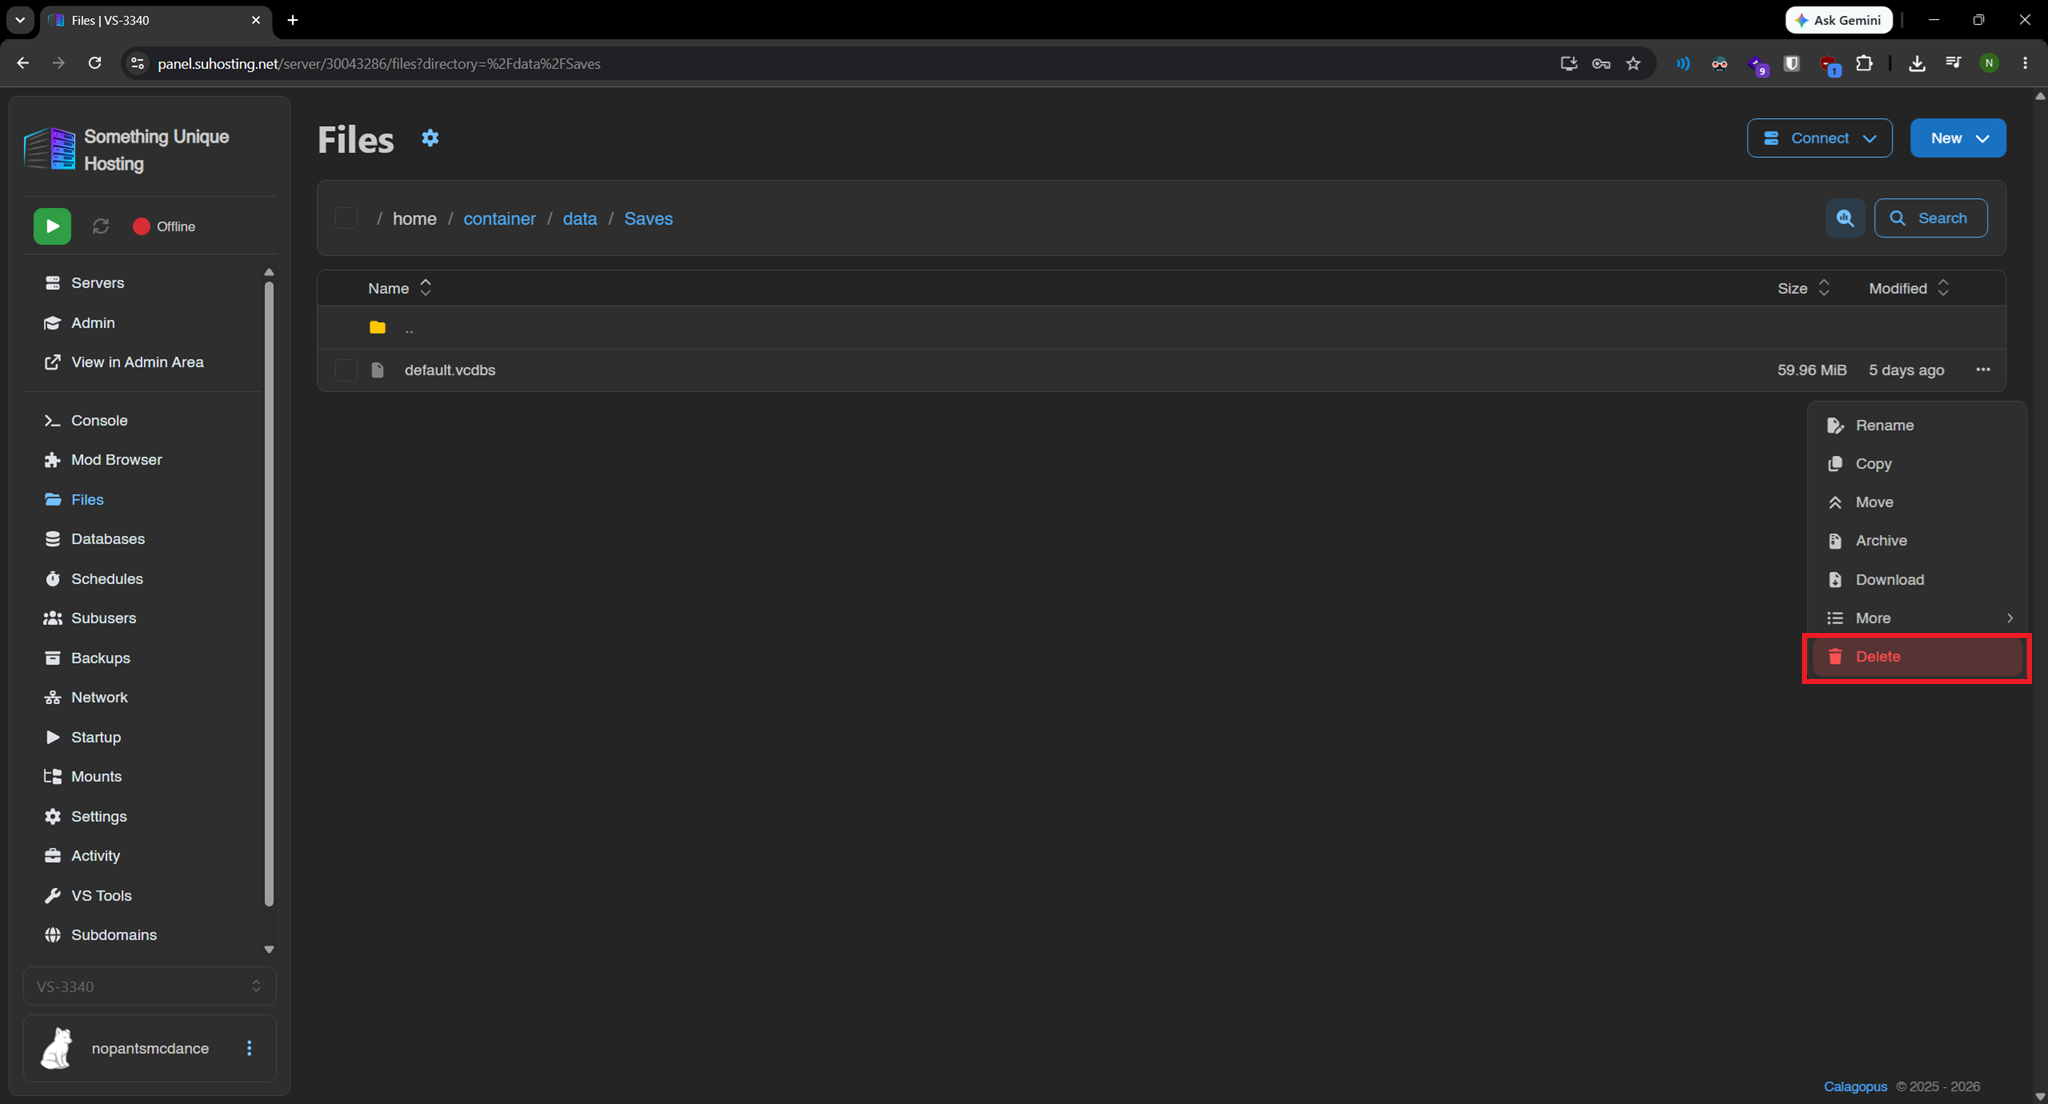
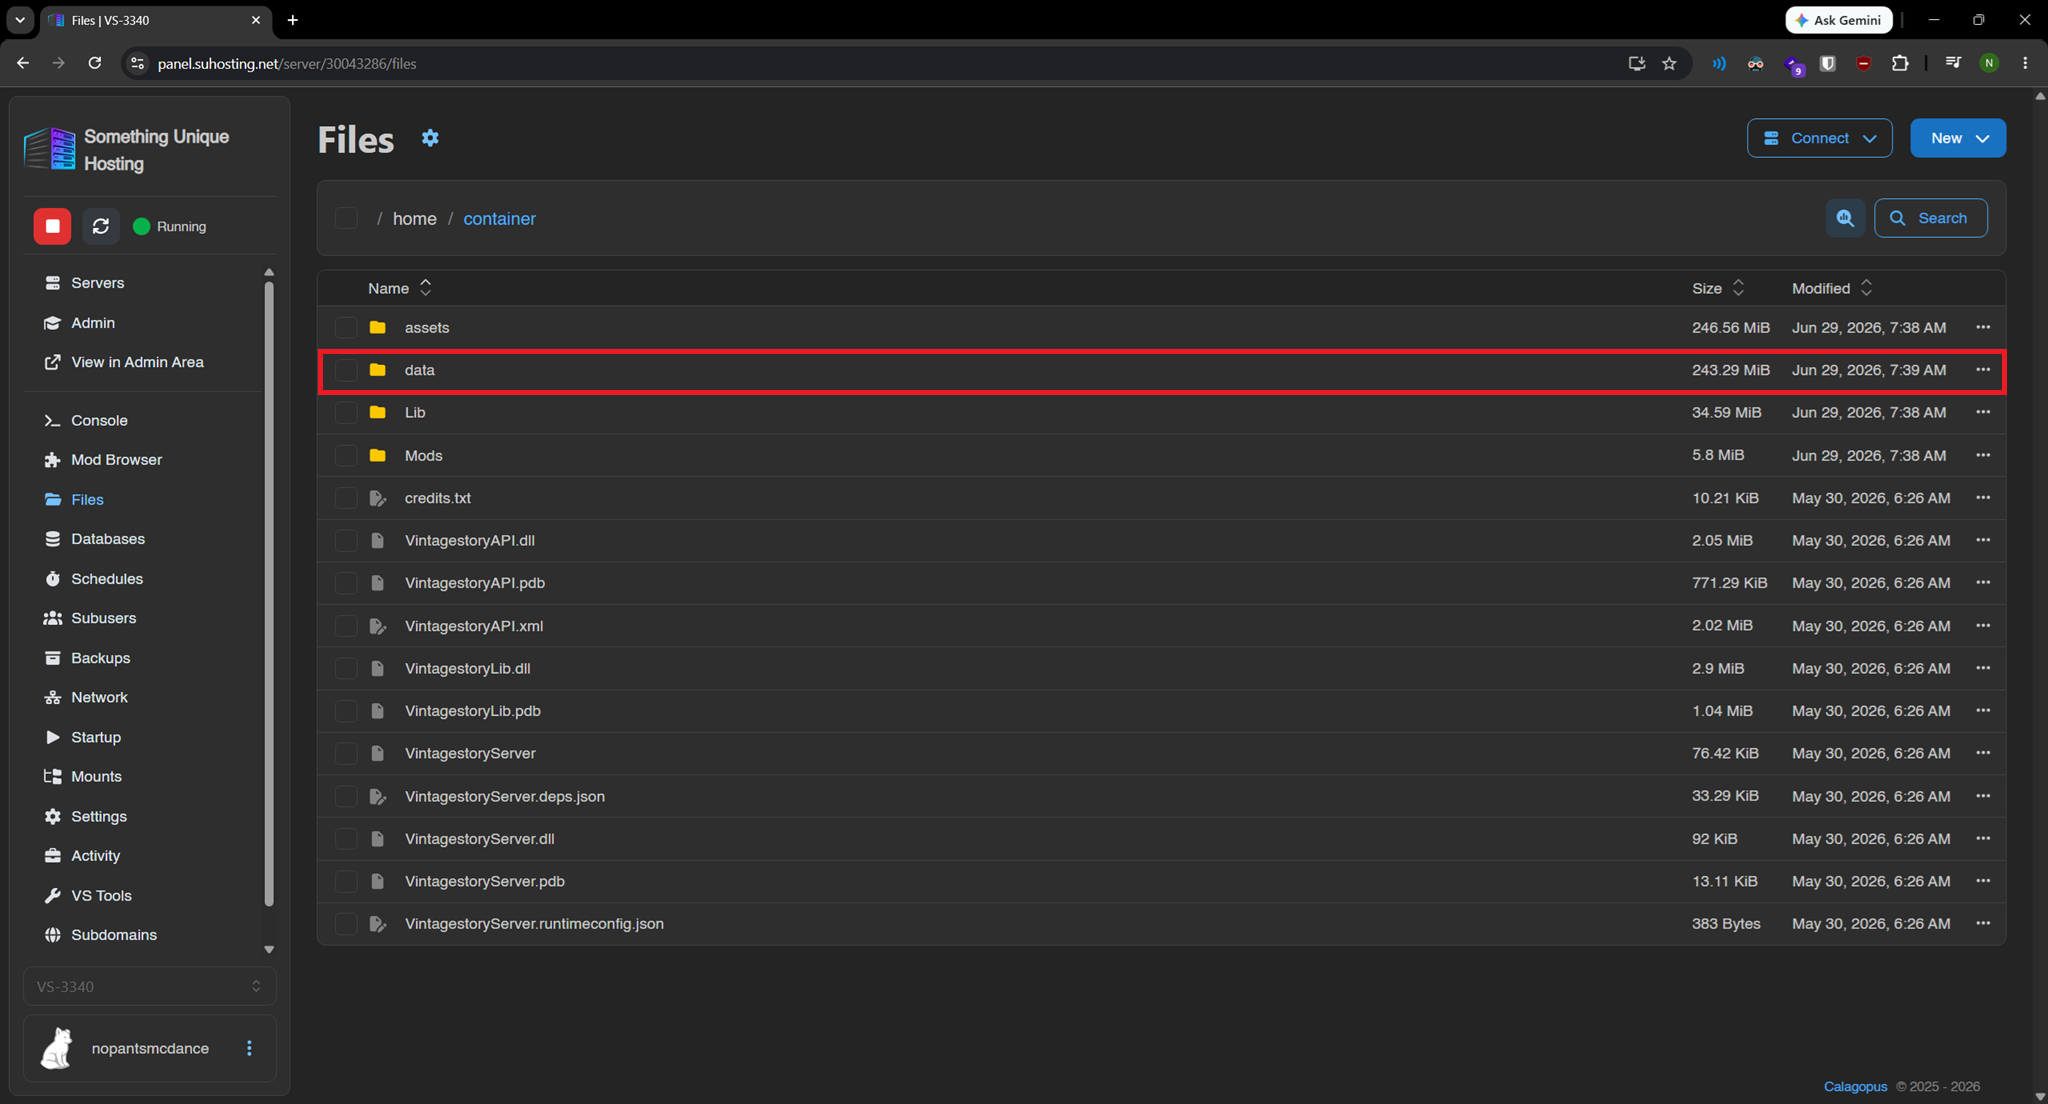
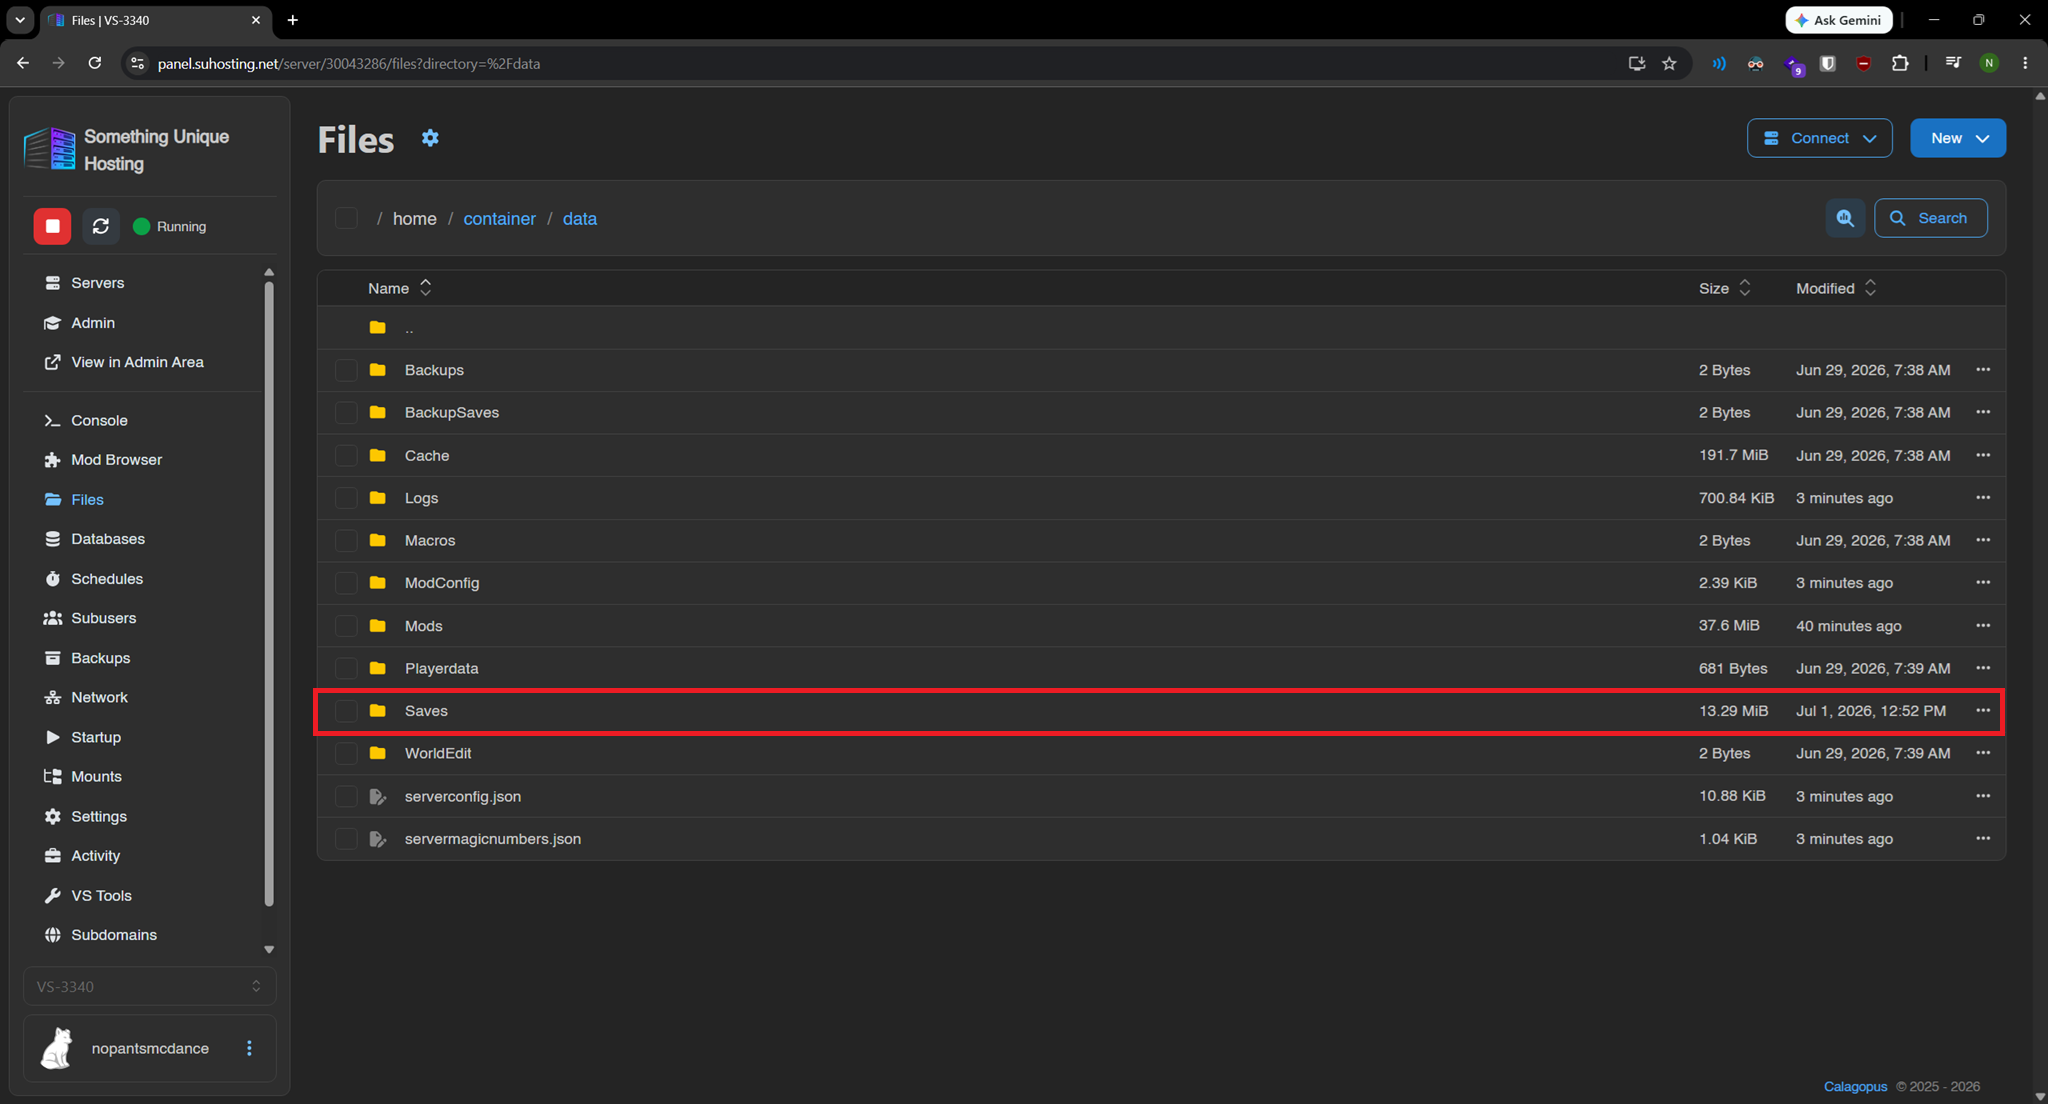
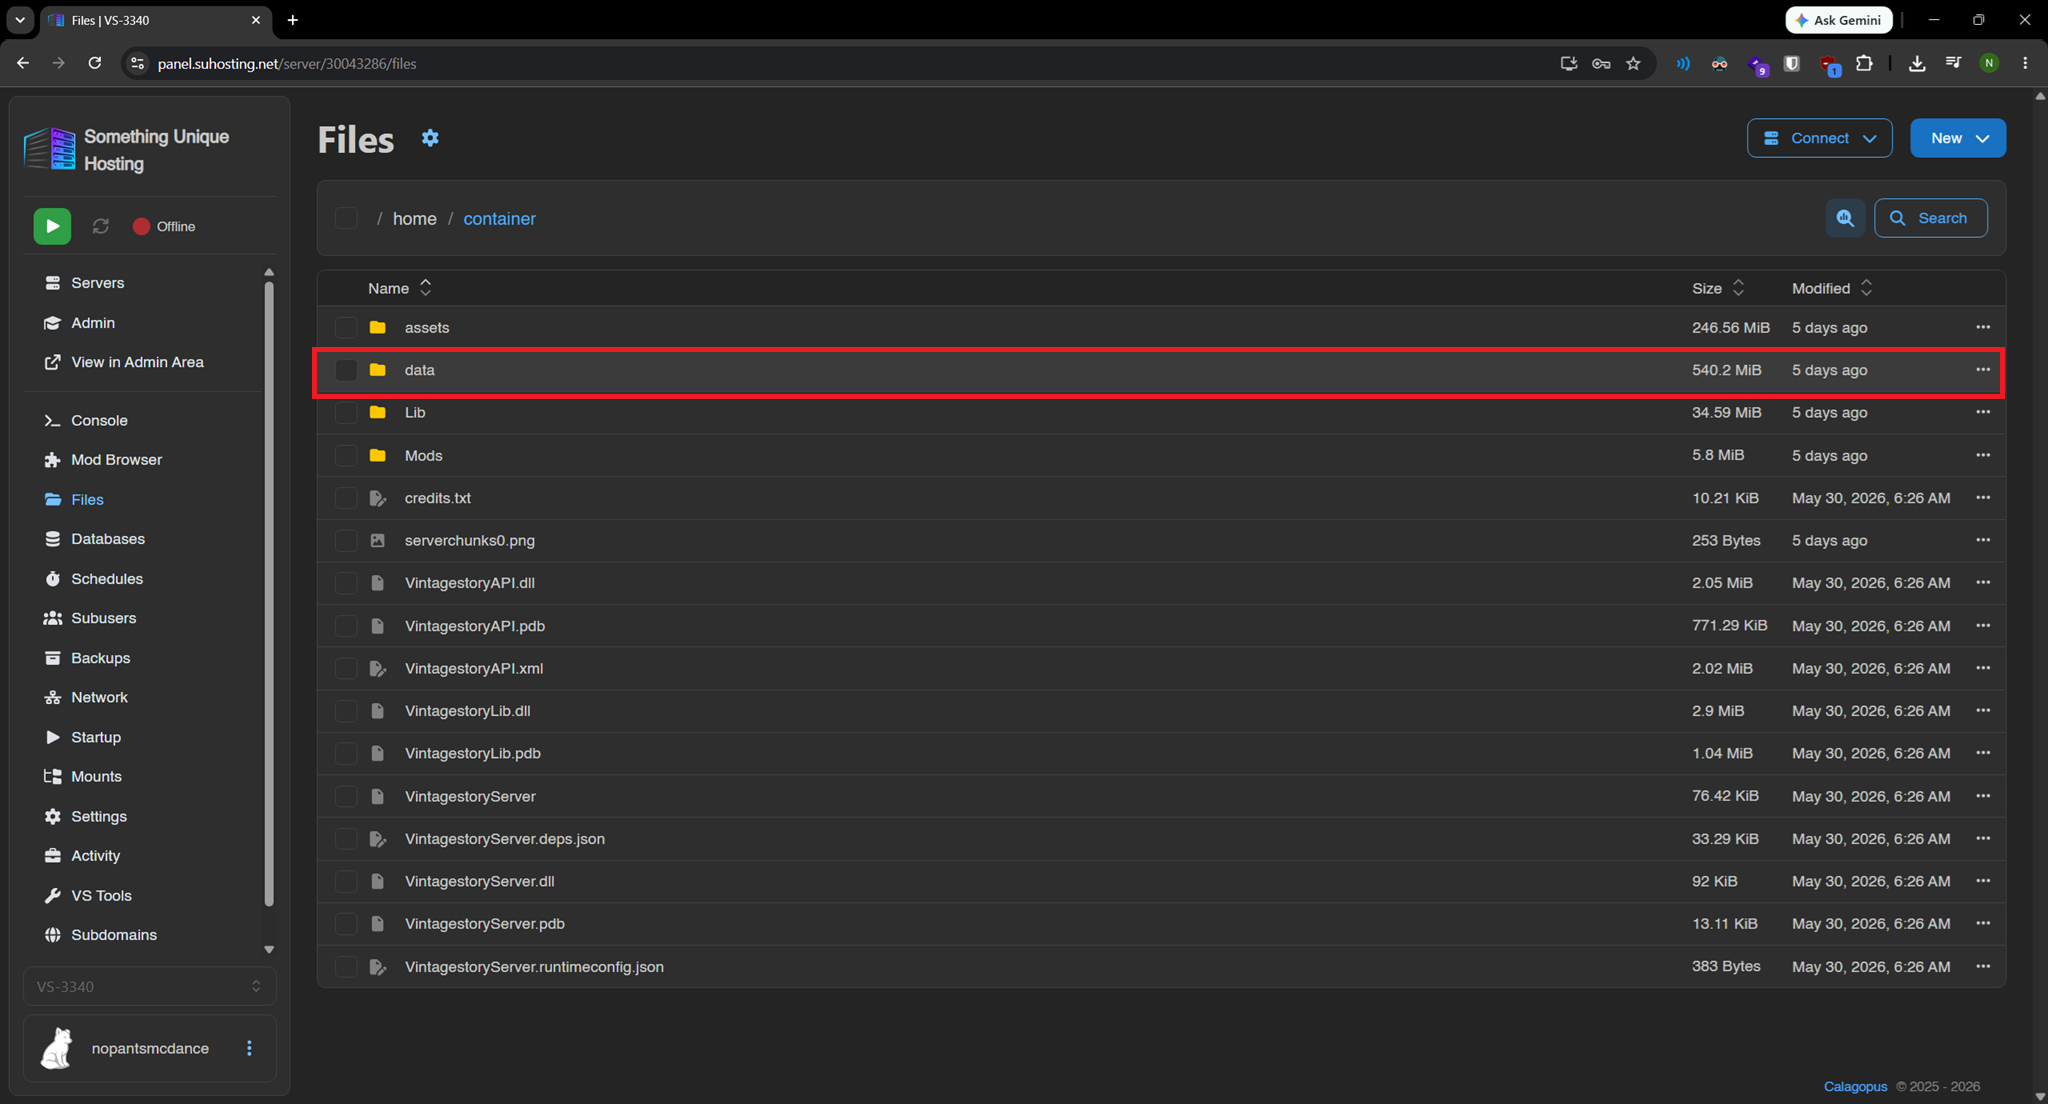
Once inside the files tab go to the data/Saves folder. IF THE SAVES FOLDER DOESN'T EXIST START THE SERVER FIRST.
Next delete the "default.vcdbs" file. Click the "..." button and then "Delete"
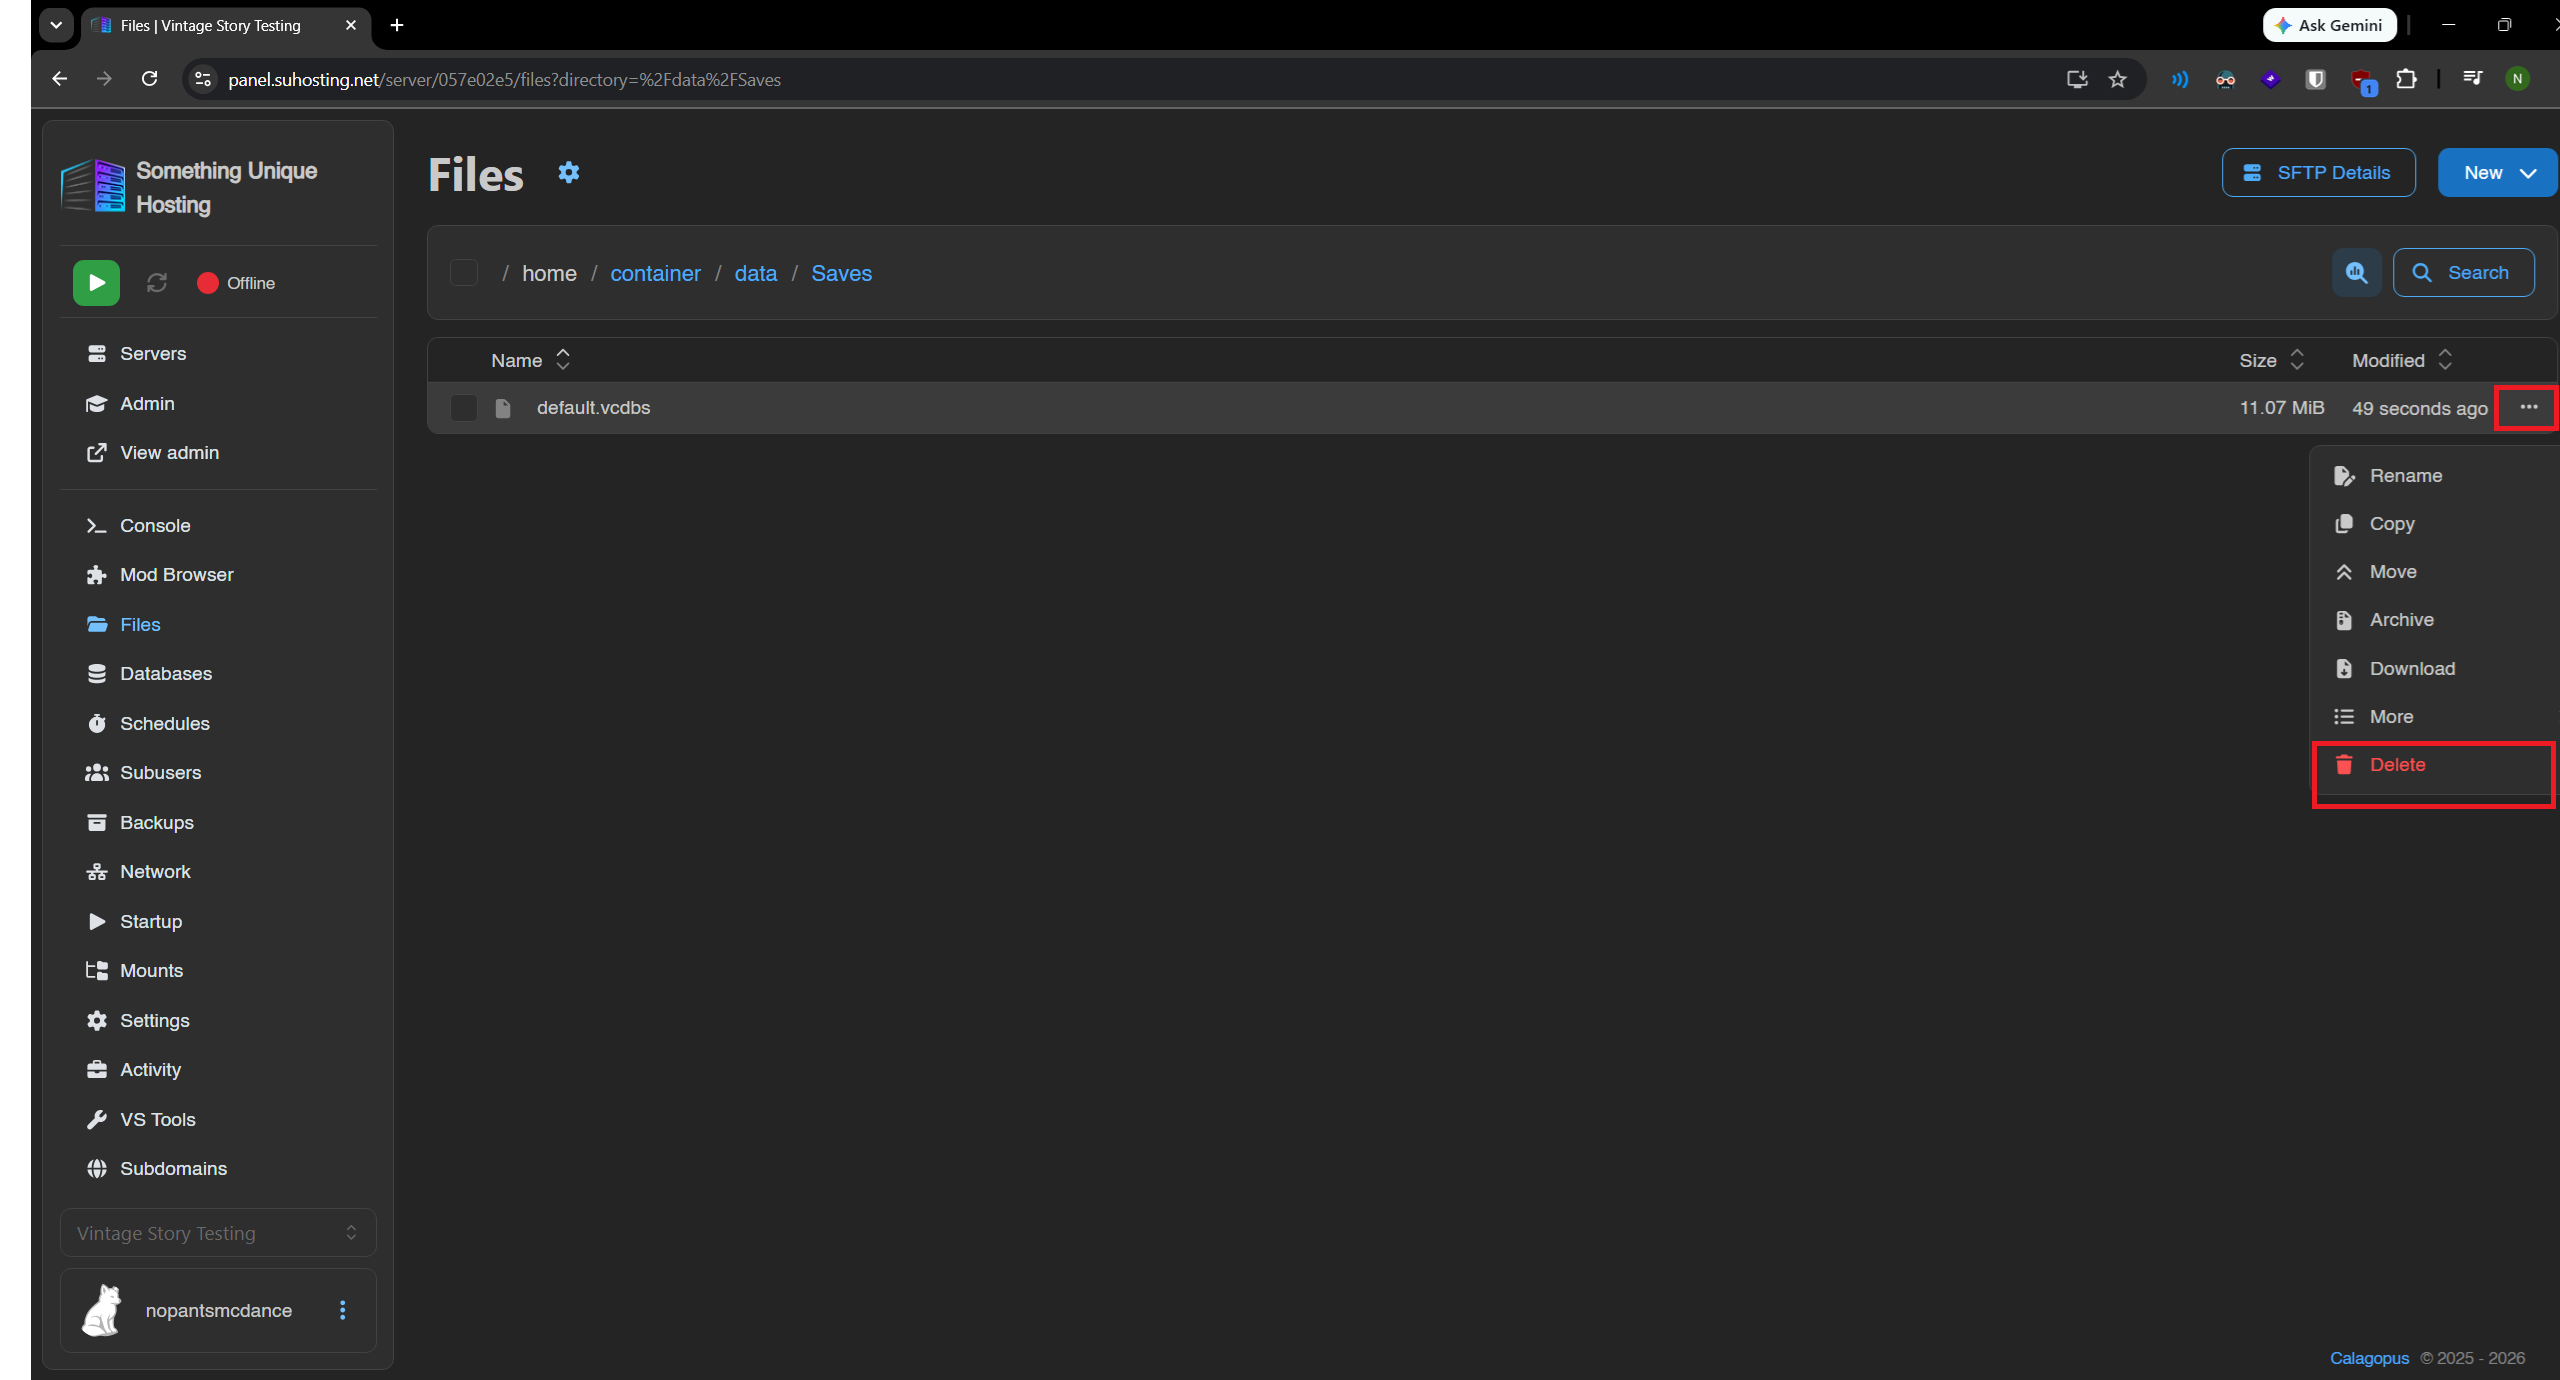
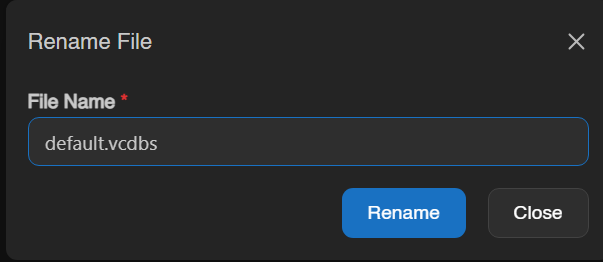
Next, open the window for the VintageStory save folder we opened earlier. Drag and drop the save you want to the game panel window to upload it to the server. After it's uploaded we need to rename it to "default.vcdbs"
After that you can start the server.
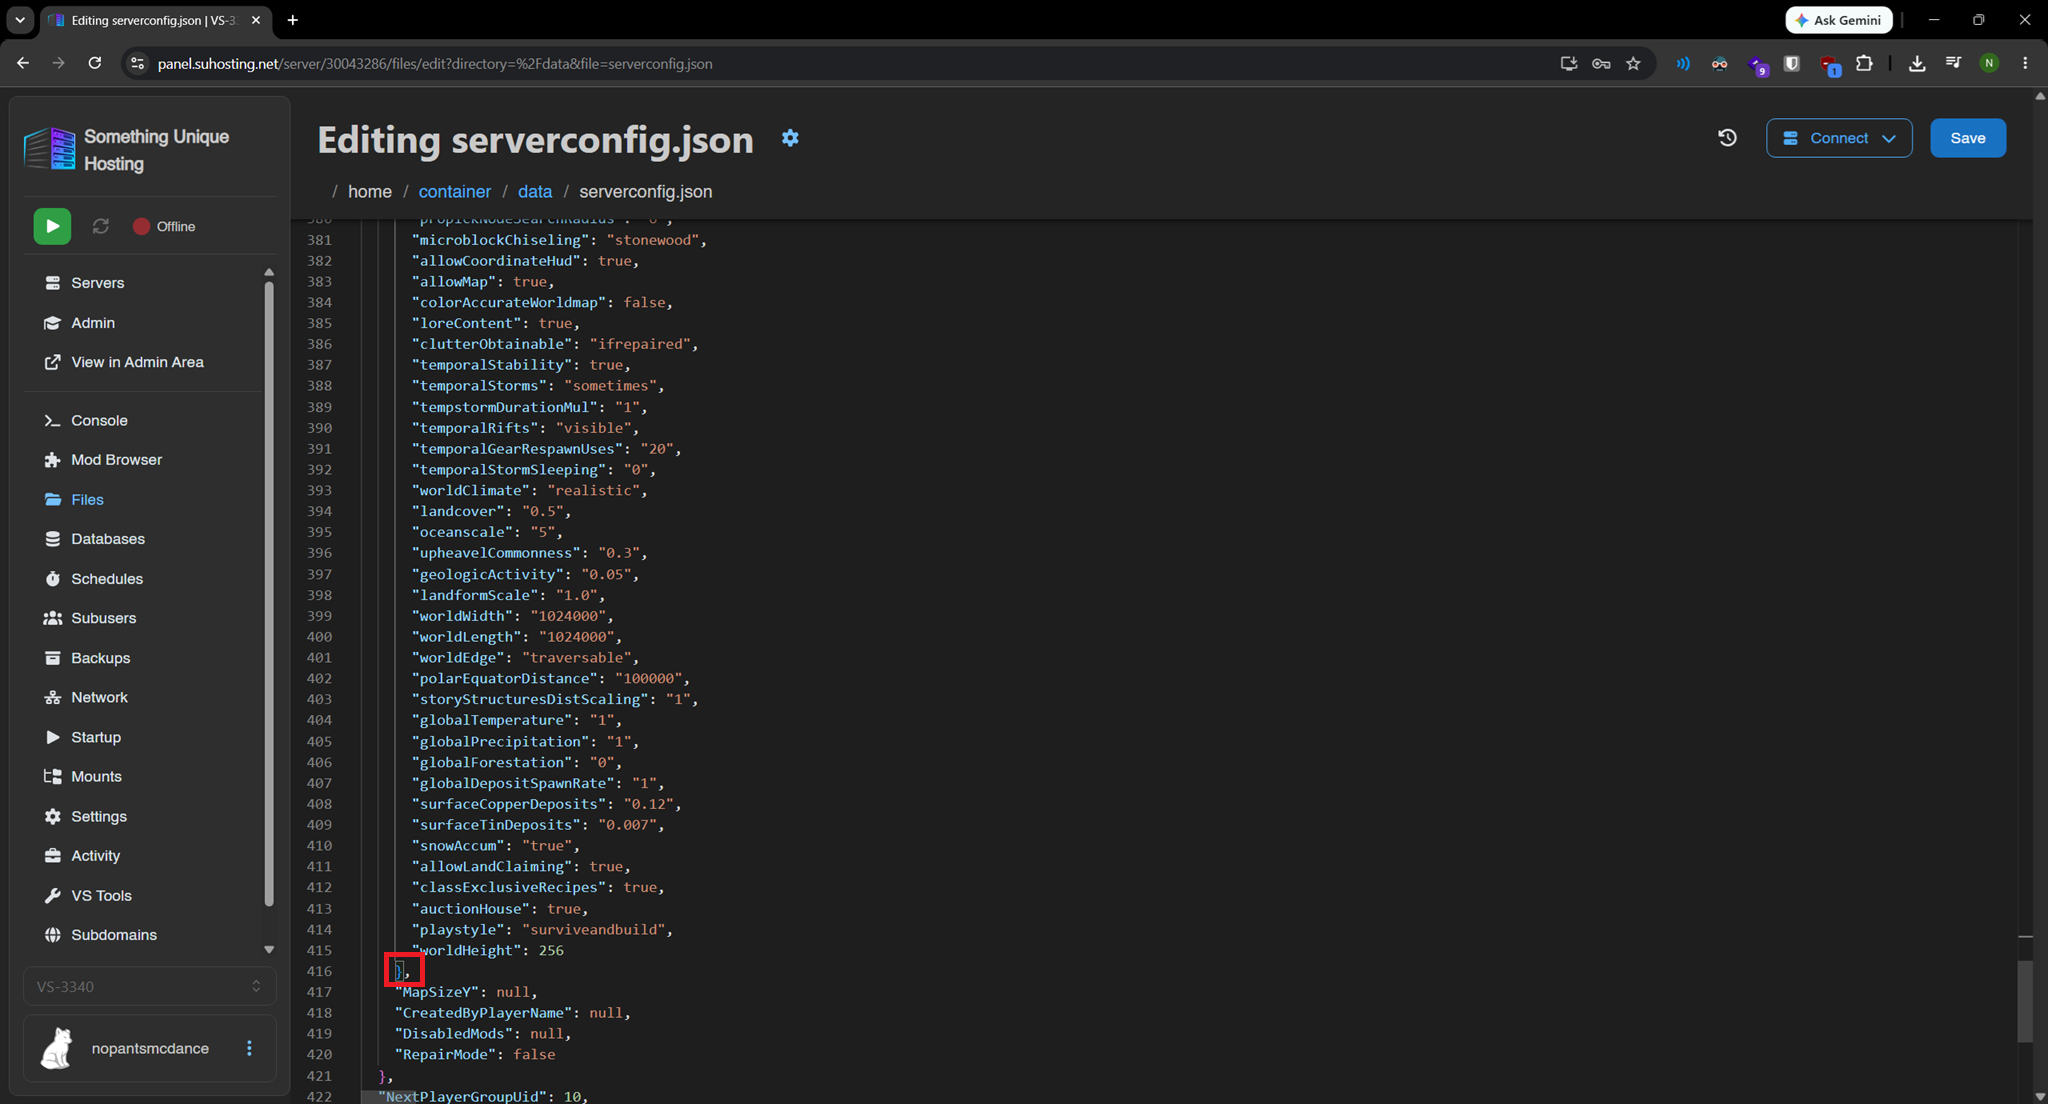
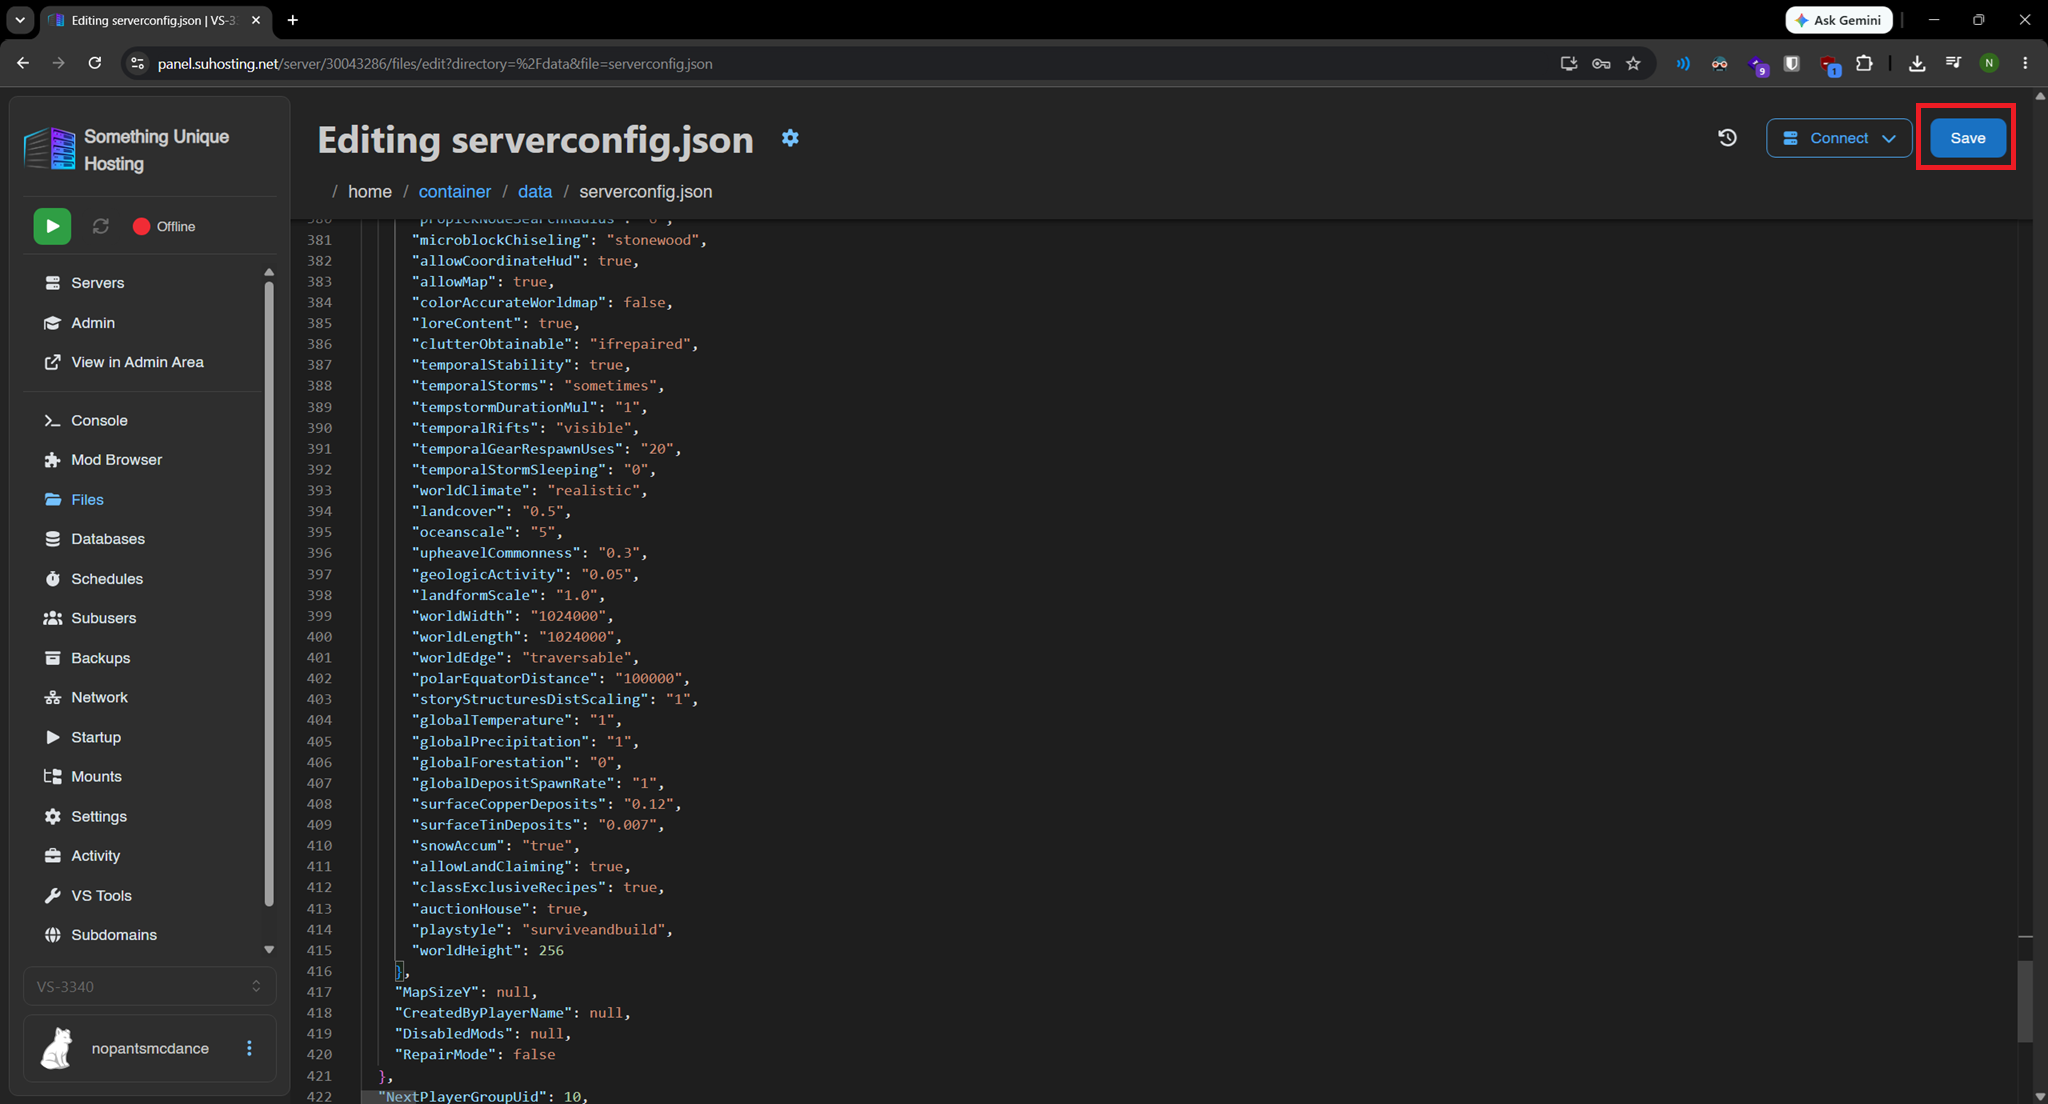
How to use custom game settings from singleplayer to create a world
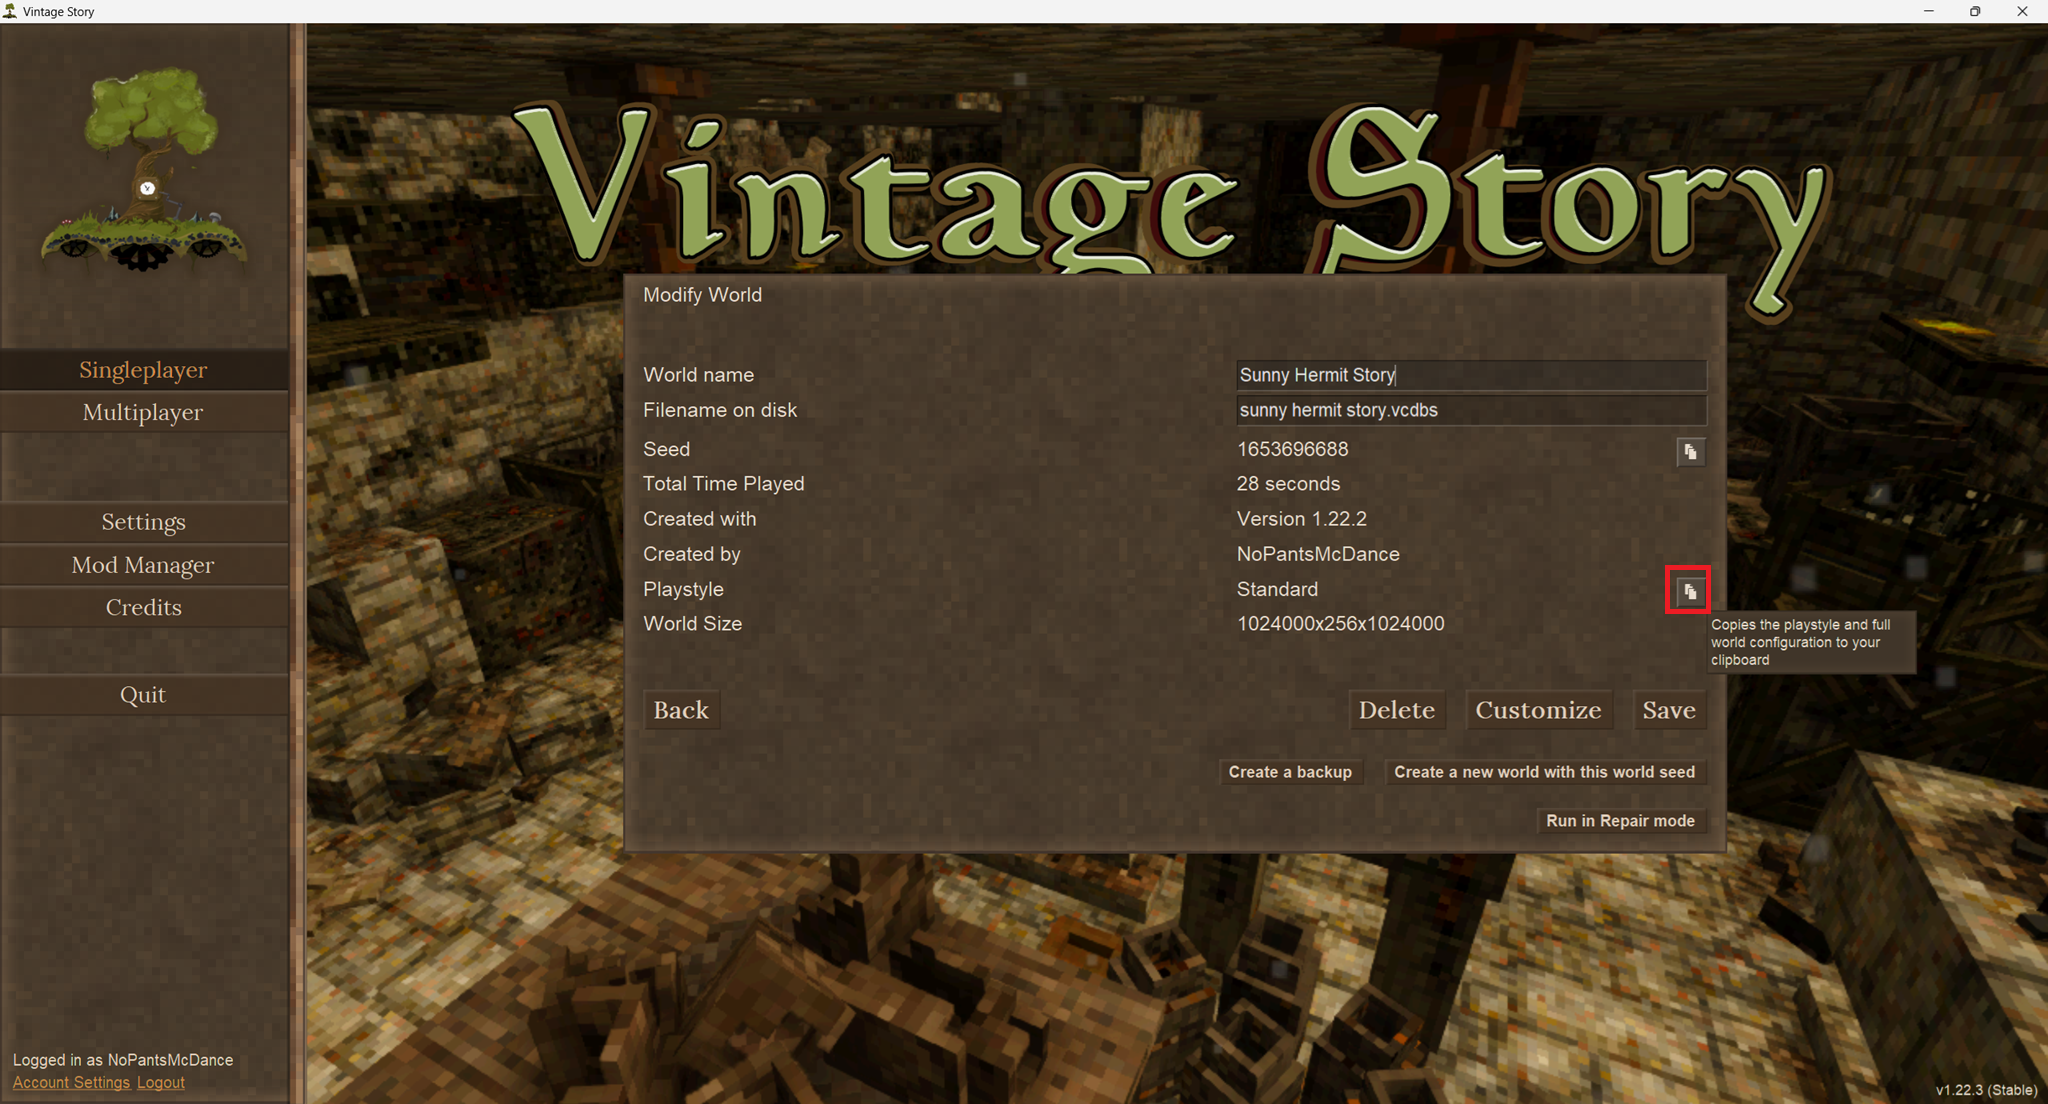

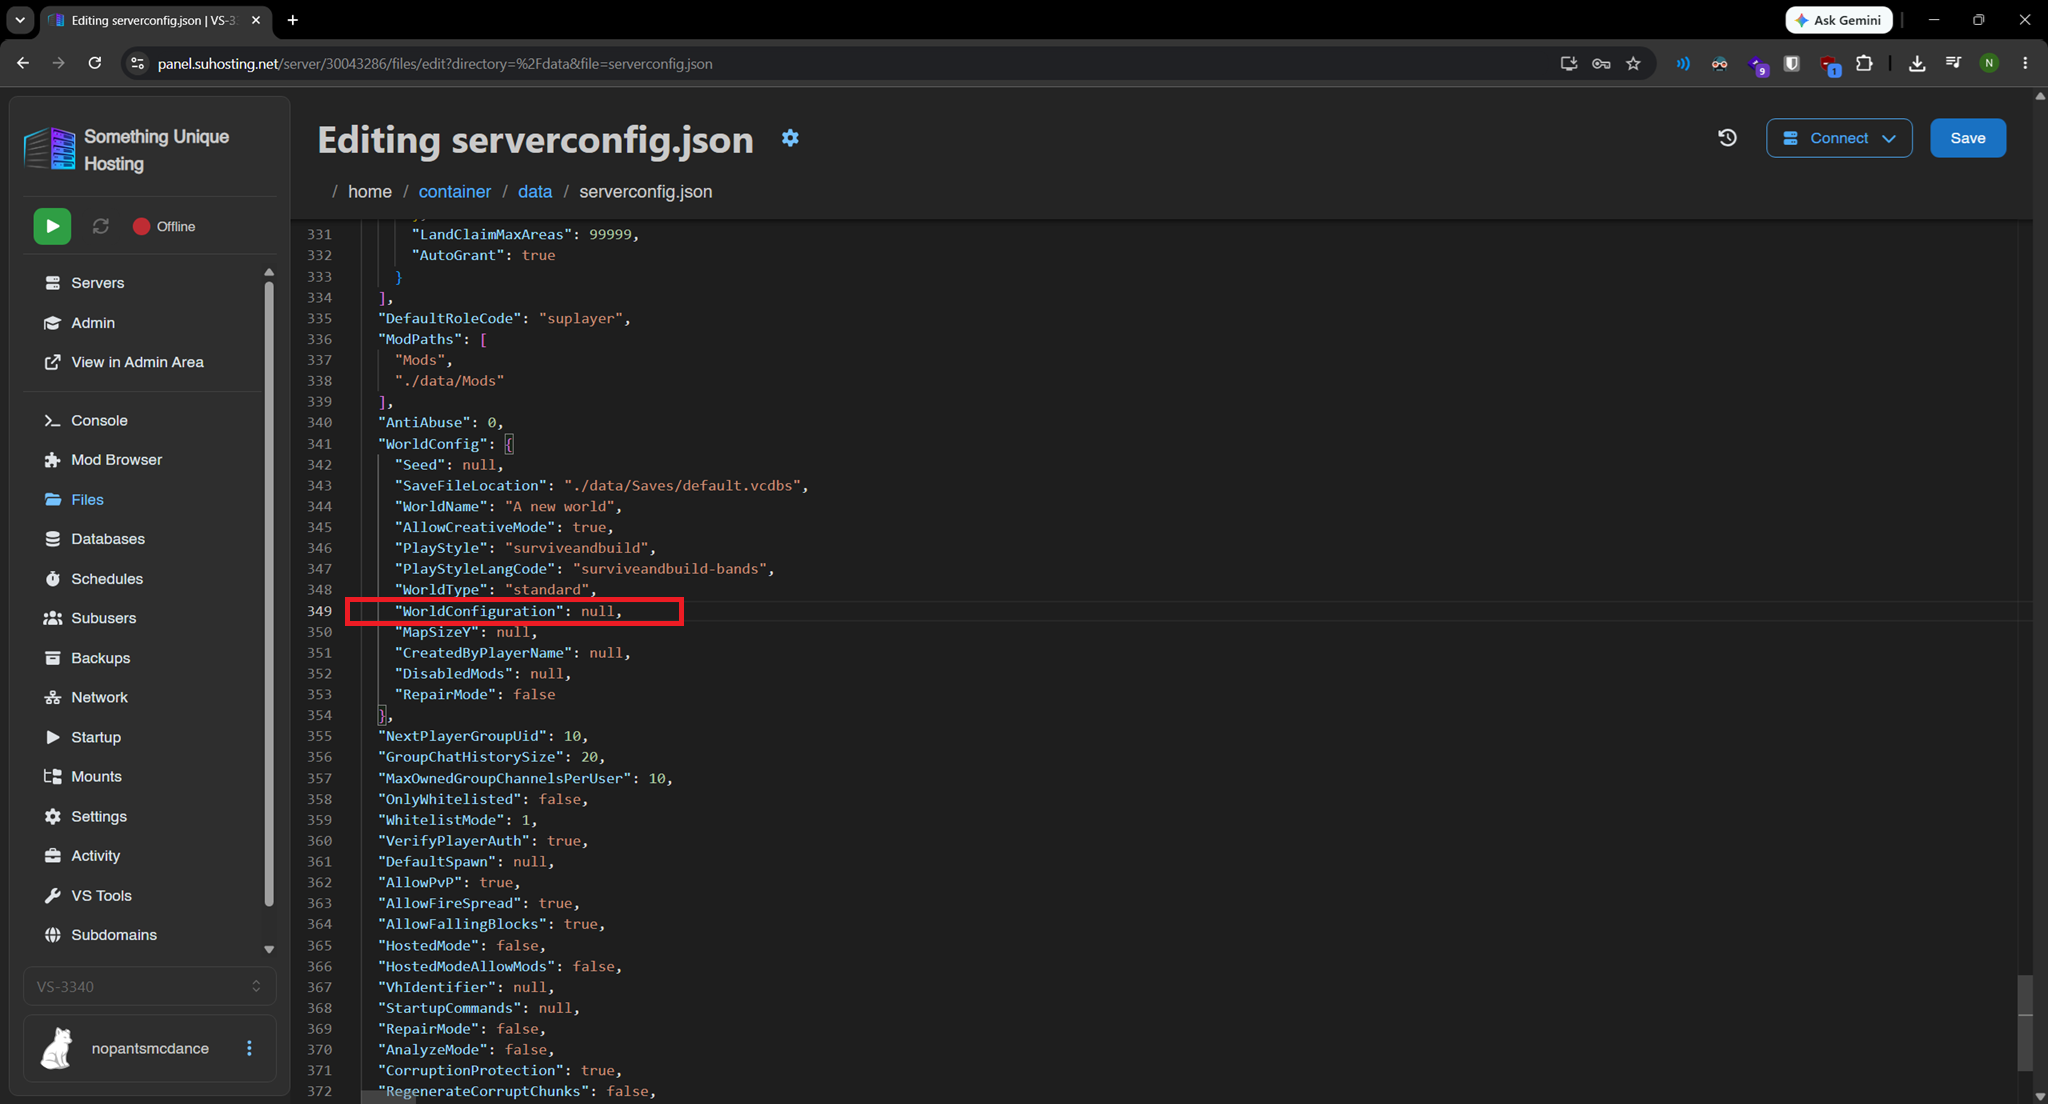

VERIFY THE COMMA EXISTS AFTER THE } WHEN PASTING YOUR SETTINGS