Mods are picked up when the server starts. After any change you'll see a blue Restart the server for them to take effect notice; restart from the Console tab when you're ready.
## Before you start: BepInEx Valheim mods need the **BepInEx** mod loader. You don't have to think about it: it is installed automatically with your first mod (every Thunderstore mod lists it as a dependency), or click **Install BepInEx** in the yellow box at the top of the tab. Once it's there, the tab shows a green *"BepInEx vX installed"* line instead. Your server's **Startup** tab has a **Load BepInEx** variable (default `1`). Set it to `0` to start the plain, unmodded game without deleting any mods, for example to check whether a problem is caused by a mod. ## Importing a profile from r2modman (quickest) If you already play with a mod set in r2modman or the Thunderstore Mod Manager, export it as a code and import it in one go: 1. In r2modman open your profile and choose **Settings → Profile → Export profile as a code**. Copy the code (it looks like `2b7f1c9e-4d3a-4e8b-9c1f-6a5d8e2b3c4d`). 2. In the panel open **Valheim Mods → Import profile**, paste the code and click **Preview**. 3. Check the list. Each mod shows **NEW**, **INSTALLED** (already on the server at that version), **UPGRADE** or **DOWNGRADE**, and a *disabled in profile* badge if you had it switched off in r2modman. 4. Leave **Write the profile's config files** on if you want your r2modman settings copied to the server (they go to `BepInEx/config`, overwriting files with the same name). 5. Turn on **Remove mods that are not in the profile** if the server should end up with exactly the profile's mods. Off by default, so existing mods stay. 6. Click **Import profile** and watch the progress list. Restart the server when it says **Mod job finished**. [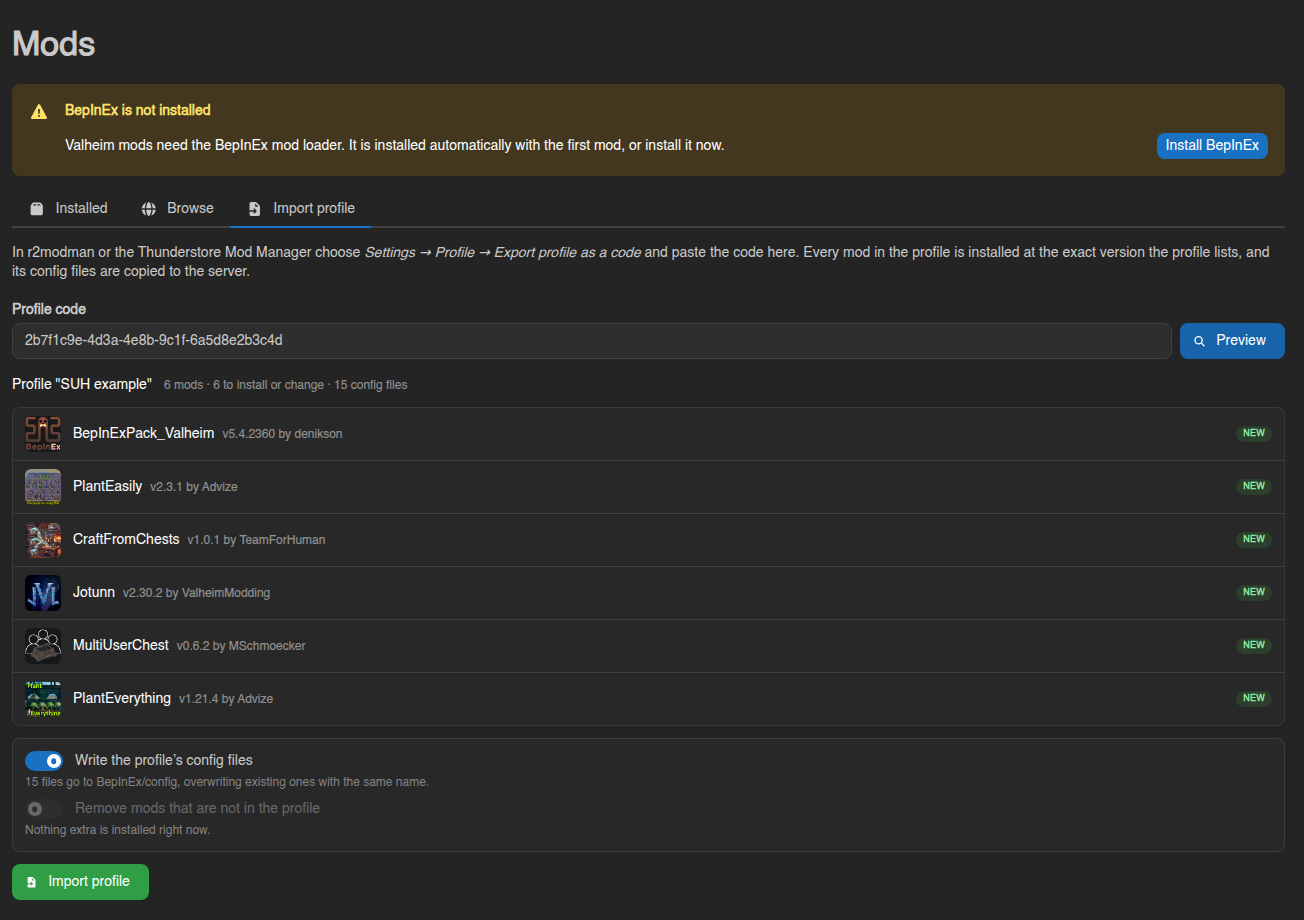](https://knowledgebase.suhosting.net/uploads/images/gallery/2026-11/valheim-mods-02-import-preview-v2.png) [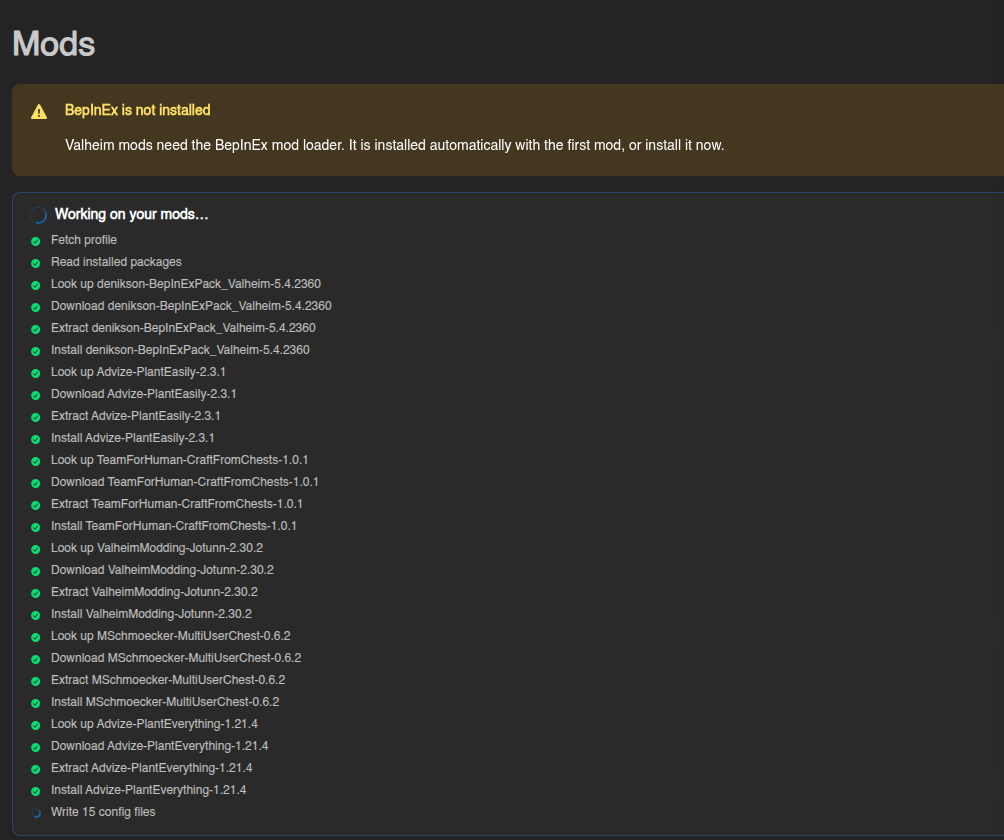](https://knowledgebase.suhosting.net/uploads/images/gallery/2026-11/valheim-mods-03-job-progress.png)A profile installs the exact mod versions it was exported with, so your server matches your own game. Keep the server and the players' r2modman profile in sync: when you update mods in r2modman, export a new code and import it again.
## Installing a single mod 1. Open **Valheim Mods → Browse**. 2. Type in **Search Thunderstore** (results update as you type; scroll down for more) and change **Sort by** if you like. 3. Click **Install** on the mod's card. The **↗** button opens the mod's Thunderstore page in a new tab. 4. The install window lists **what will be installed**: the mod itself plus anything it depends on, with the reason (*Required by …*). Pick an older release under **Version** if you need one; **Latest** is the default. 5. Click **Install**, wait for **Mod job finished**, then restart the server. [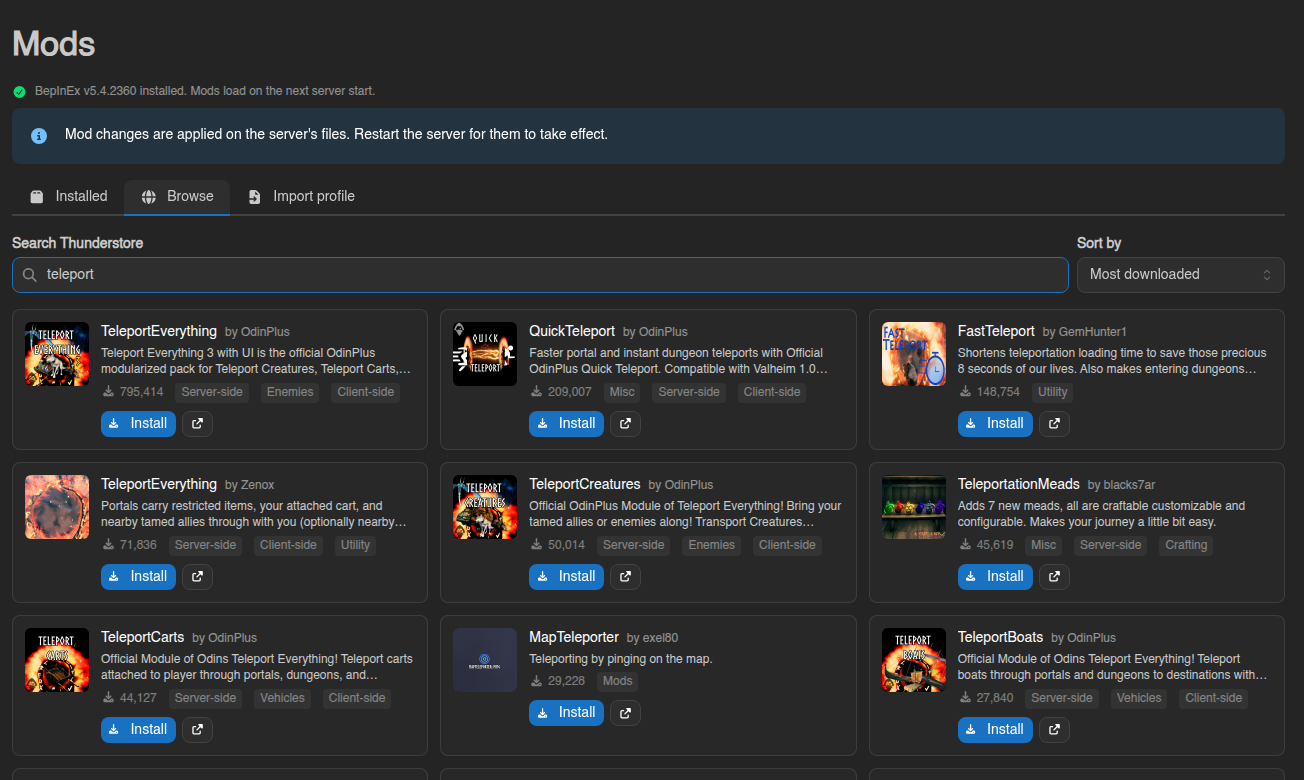](https://knowledgebase.suhosting.net/uploads/images/gallery/2026-11/valheim-mods-09-browse.png) [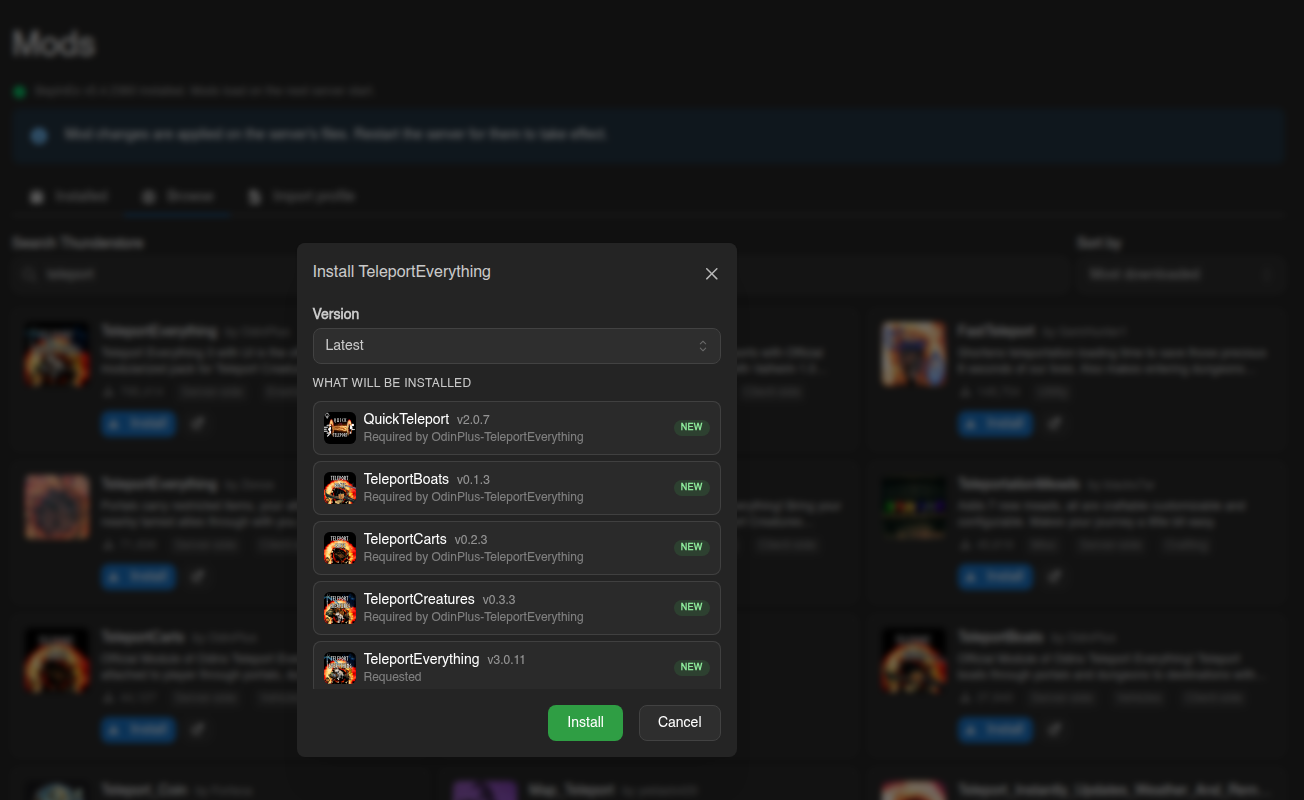](https://knowledgebase.suhosting.net/uploads/images/gallery/2026-11/valheim-mods-10-install-modal.png) Mods that are already on the server show an **Installed** badge on their card. Click it to change to a different version. ## Seeing what's installed The **Installed** tab lists every mod on the server with its version and author. The mod loader is always first and marked **MOD LOADER**. - Click the **˅** arrow on a row to see the mod's description, what it depends on, links to its Thunderstore page and website, and an **Update to vX** button when a newer release exists. - The switch on the right turns a mod **on or off** without removing it. Off mods get a yellow **Disabled** badge. The mod's files and settings stay on the server, so turning it back on is instant. [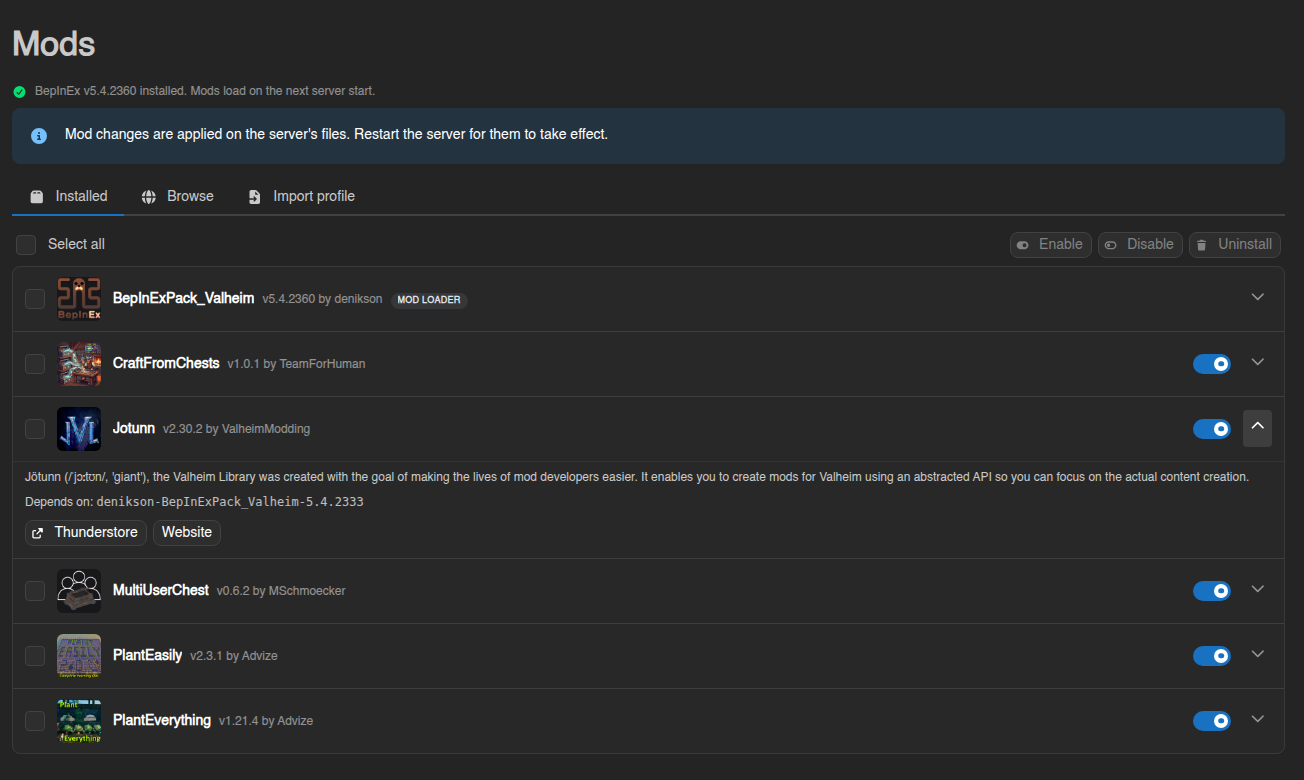](https://knowledgebase.suhosting.net/uploads/images/gallery/2026-11/valheim-mods-07-row-expanded.png) [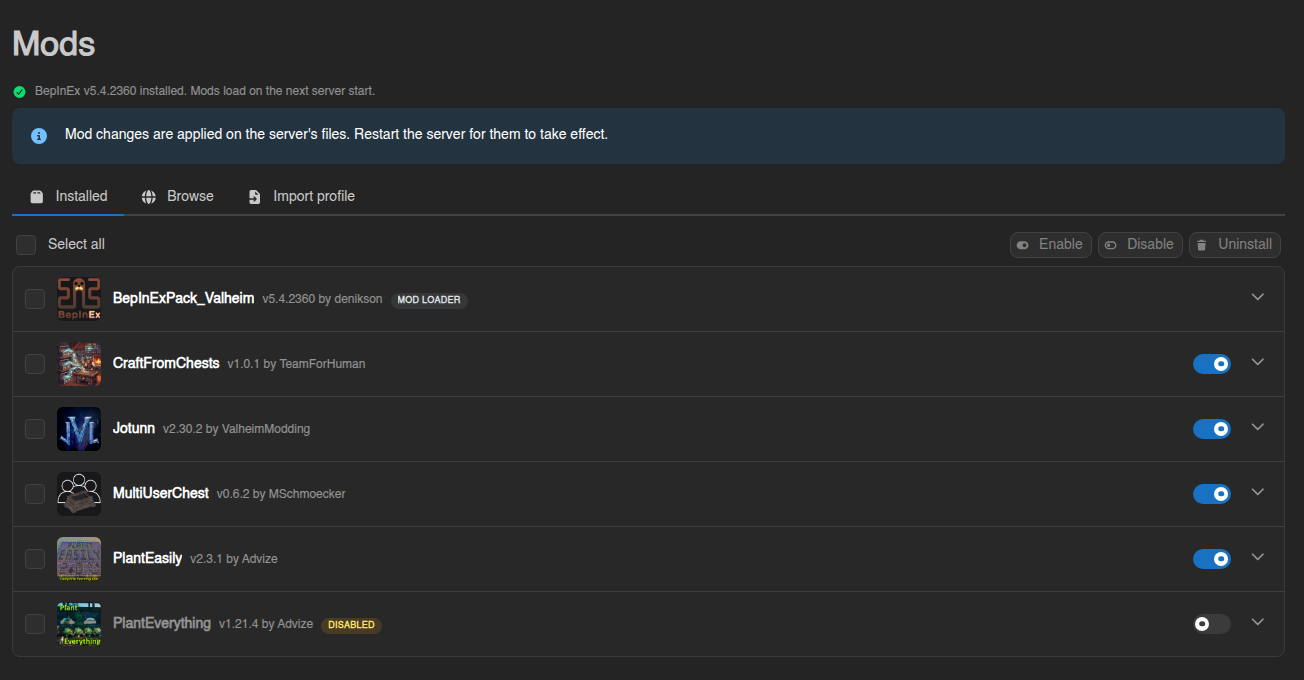](https://knowledgebase.suhosting.net/uploads/images/gallery/2026-11/valheim-mods-08-disabled.png) ## Enabling, disabling or removing several mods at once Tick the boxes on the left (or **Select all**) and use the buttons above the list: - **Enable** / **Disable** switch all selected mods. - **Uninstall** removes the selected mods' files. Their settings in `BepInEx/config` are kept, so a reinstall picks them up again. [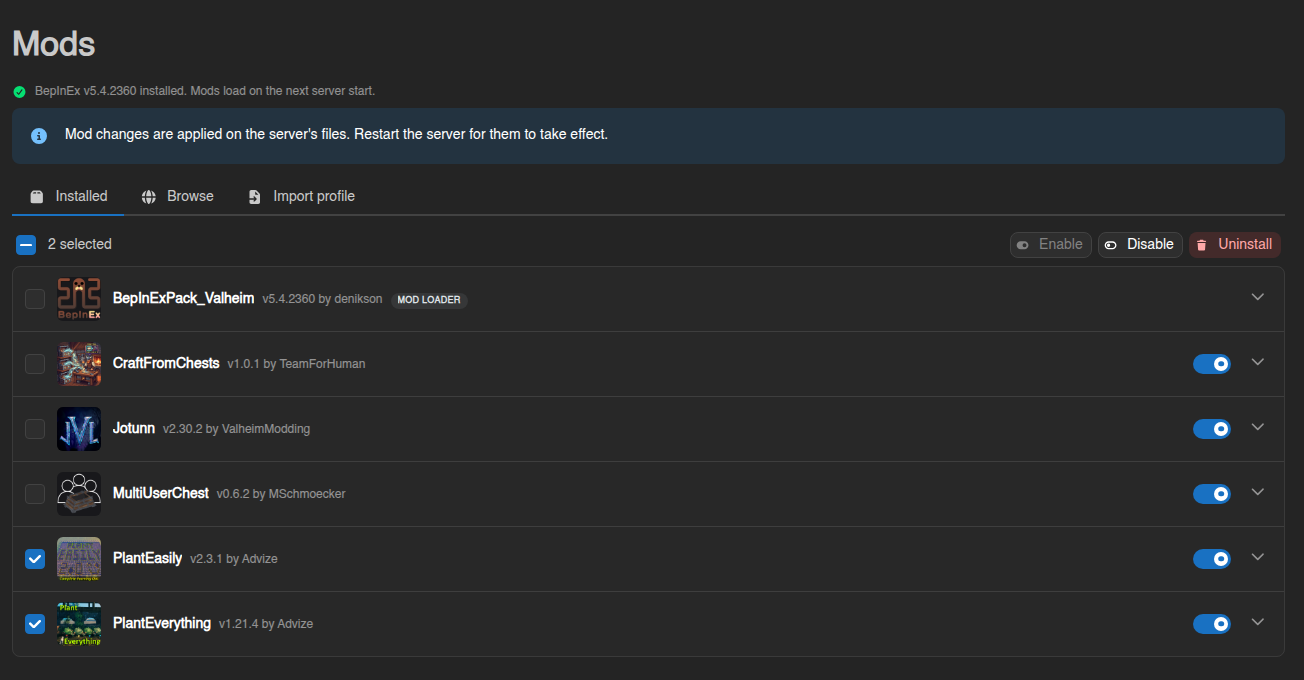](https://knowledgebase.suhosting.net/uploads/images/gallery/2026-11/valheim-mods-06-selection.png) The mod loader can't be removed while mods are installed. Uninstall the mods first, then BepInEx. ## Updating mods Expand a mod on the **Installed** tab: when Thunderstore has a newer release you'll see a blue **vX available** badge and an **Update to vX** button. The update keeps the mod's config file. ## Good to know - **One job at a time.** Installs, imports and bulk changes run as a job on the server; while one is running the others wait. The progress box shows every step, and a failed step tells you why. - **Players need the same mods.** Most Valheim mods must be installed on both the server and every player's game. Share your r2modman profile code with your players so everyone runs the same versions. - **Config files** live in `BepInEx/config` and can be edited in the **Files** tab. Mods create them on first start. - **Logs**: if a mod misbehaves, `BepInEx/LogOutput.log` on the server (Files tab) lists every plugin that loaded and any errors. The same lines appear on the Console at startup. - **Something broke?** Set **Load BepInEx** to `0` in the Startup tab and restart: the server runs unmodded while you sort it out, with all mod files left in place.